Showing posts sorted by relevance for query Recovery mode. Sort by date Show all posts

What is Stock, Custom, Recovery Mode in Android and The Function

Just like it's named, recovery mode take an act to recover your Android device. In simple way for me, recovery mode is like some "first aid" when something happen to your device. Recovery mode is one of feature in Android smartphones that serves to fix, add, replace, remove (delete), the contents of our Android device or even to upgrade the Android version. Maybe we often hear recovery mode is needed when are to install custom ROM, systemUI mod, or adding tweaks (script to boost performance) to our device.

To put our Android device into recovery mode, turn off the device, and then press the following button: Volume Up + Home + Power, simultaneously and hold its for 5 second. When you are in recovery mode, use the Volume Up and Volume Down button as navigation and Power button as confirmation (in CWM recovery the confirmation button is changed to Home button).

Stock recovery in android


Stock recovery is the default recovery of Android smartphones from the device manufacturer. Features in stock recovery is soooo... limited. And sometimes (many times) if we do an "install from zip" will become failed because "file header verification failed", that is because the device manufacturer is some kind like "protect" the system from being modified. Even on some Android smartphone brand does not have default recovery mode installed. So for the reason, installing a custom recovery is something we can not avoid IF we want to change the system of our Android device effectively
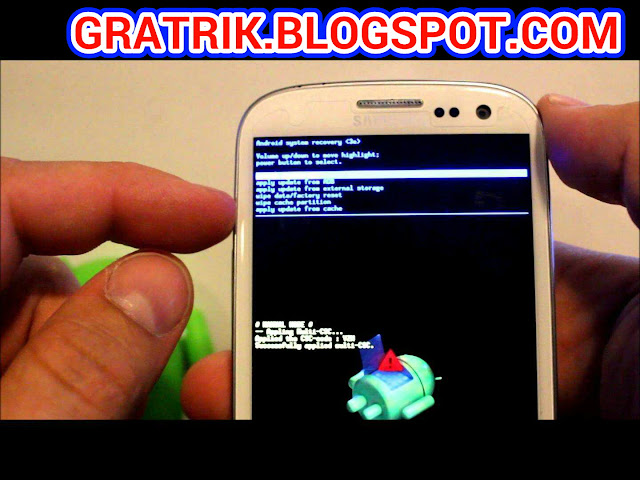
(Stock recovery mode on samsung)

Custom recovery CWM and TWRP


As it says "Custom", not original, it is a recovery mode that is made by 3rd party. In Custom recovery is added some features that does not exist in stock recovery like backup, touchscreen support, file manager, etc. There is two most popular custom recovery used by Android device user, that is CMW (ClockWorkMod) and TWRP (Team Win Recovery Project), although there's another custom recovery like Philz Recovery. Most important thing in custom recovery is ability to disable the "signature file verification", so we can install or flash any file we want without worry the zip files being blocked to be flashed because the signature things just like in the default recovery.
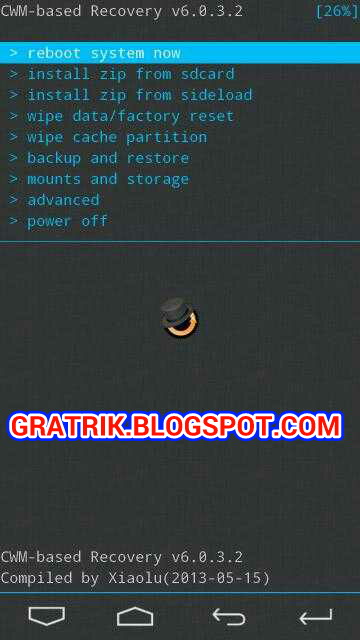
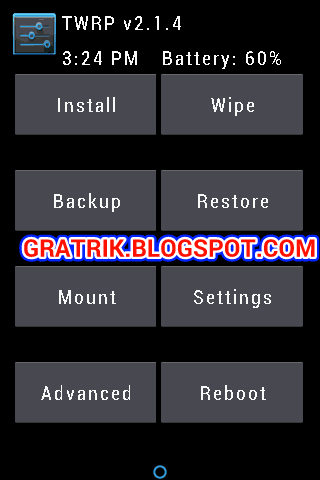
(CWM custom recovery mode)

(TWRP Custom Recovery Mode)

To install a custom recovery we need to find the correct recovery file to our Android device model. We must extremely carefull because different way to install the recovery, different smartphone device model, and the recovery file will be different. If we choose the wrong recovery file or wrong method will cause our Android device unable to enter to recovery mode anymore, or even worse: bootloop or softbtrick.

Source: Google.com

How to Install CWM Custom Recovery Mode Without PC or Computer Samsung Galaxy V SM-G313HZ

RULES:

- In this blog i just share things that i had done, I am not force you to follow this tutorial so DO WITH YOUR OWN RISK.

- Before begin the tutorial, make a proper backup so you'll not regret this if you fail. And so before installing this CWM, use the "backup recovery" feature on the Flashify app to backup your phone stock recovery. So if the new recovery is not like we expected, we just restore the old one in the Flashify app.

CWM (clockworkmod) is one of the most used custom recovery in Android. We can install CWM recovery on our Android smartphone without PC with the help of Flashify app and an .img cwm file (the img cwm file must be compatible with our android smartphone type).

What is needed:
- Rooted Android smartphone
- Handsome :v

Steps how to install CWM custom recovery mode without PC [Samsung Galaxy V SM-G313HZ]


1. Download and install Flashify v 1.6.6.apk app.

2. Download file recovery.img that compatible with your android smartphone. For Samsung Galaxy V SM-G313HZ Vivalto user, you can download this CWM Recovery vivalto flash.img.

3. Open the Flashify app and don't forget to grant the superuser permission if asked, then choose "recovery image" -> "select file" -> find where you save the recovery.img file -> "yup!" -> "reboot....." (see screenshot)


4. After that we will go to recovery mode (use the volume up and volume down as navigation, and home button as confirmation). Choose "reboot system now" to reboot your smartphone -> Then if there is choices like "...fix supersu...?", or "...disable...?", then just choose "..yes..." just for this first time, for the next time you can choose "...go back..." or "...no..."

Congratulations! Now your smartphone is installed CWM recovery. Now you can install or flash anything zip file you want like more feature, mods, or even change your smartphone ROM.

Source: blogmarcopunya.blogspot.com

>> Flashify v 1.6.6.apk Android Application Download

>> CWM Recovery vivalto flashable#3.img

Install TWRP v 3.0.0.0 Recovery Without PC or Computer Samsung Galaxy V SM-G313HZ

TWRP (Team Win Recovery Project) is another one of the most used custom recovery for Android smartphone. This time i will share TWRP for samsung galaxy v SM-G313HZ, vivalto KST kernel (had OTA updated before), and can be installed without PC / computer (through recovery). For you who use another kernel (or have not update your device via OTA), maybe you can try this recovery too, but maybe i can not guarantee the success. So make a prepared backup, and do with your own risk. You also can use Flashify v 1.6.6 app to backup your current recovery and restore it later when you need.

twrp 3.0.0.0 custom recovery samsung galaxy v


Requirements:
- Rooted
- CWM recovery installed
- File TWRP 3.0.0.0 VIVALTO.zip (+- 8.4MB)
- Backup as needed
- Brain :v


TWRP recovery for Samsung Galaxy V device is made by Indonesian, one of member XDA forum cleverior.ipul. Why we need to choose install TWRP, although before we have installed CWM, it is just the same? You right, but after installed TWRP i just realized that there is so many benefit and advantage that i don't found on CWM recovery before, like TWRP is support touch, so we don't need to press the hardware key of our device many times that will cause to earlier key broken on our device.

Some features that i do not found on CWM recovery previously i installed:
  • Touch support
  • We can take screenshot by pressing key: volume down + power
  • We can choose where we will save the backup (internal or external)
  • We can choose what partitions we want to backup (is it backup just the system, the data, etc...)
  • Nandroid backup size is smaller (because it don't backup internal, it's good as internal itself is part of device MEMORY). When create Nandroid backup using CWM i found the size is +3 GB, but when using TWRP it's just +-1 GB (can be smaller by check the "compress" option)
  • File manager (in "Advance" menu")
  • And many more...

Installation TWRP 3.0.0.0 Samsung Galaxy V without PC / computer


Download the flashable zip file of TWRP 3.0.0.0 above, place it on your external memory card. Just straight put your device into recovery mode, choose "Install zip" -> "Choose zip from sdcard", find and choose where you put the TWRP zip file, choose " Yes...". Reboot smartphone (or automatically reboot).

When we go to recovery mode with TWRP for the first time, there will be a warning wizard that is you want to use the TWRP for JUST THIS TIME or want to use it PERMANENTLY (replace your stock recovery). If we want to use it permanent (replace the previous recovery), we must accept the TWRP to change the system to make TWRP permanent on our device. Just read the first wizard...

Source and thread: XDA Forum

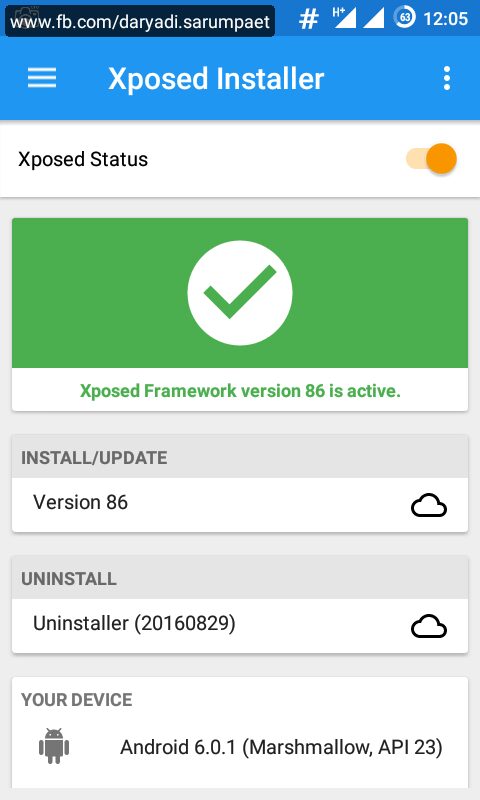
Xposed Framework Installer for Android 6.0 Marshmallow / CM13 ROM

Allright, now here is the official Xposed Framework Installer for you who use phone with Android 6.0 Marshmallow version. This Xposed for Marshmallow has been tested by me on an unofficial CyanogenMod 13 (CM13 ROM) on Samsung Galaxy V SM-G313HZ, and work like a charm.

As we know, the Xposed for Android Lollipop (SDK21 and SDK22) and Marshmallow (SDK23) is different from Kitkat version. The installation of the Framework must be flashed through recovery mode (TWRP recommended). Untill now, the development of Xposed by the developer Rovo89@XDA is still going on and already come to ALPHA state.

Requirements:
Rooted
Custom Recovery installed
• Considering backup

xposed v 3.1 for android lollipop and marshmallow up

How to install Xposed Framework Installer on Android Marshmallow (tested on CyanogenMod 13 ROM)


  1. Power off your Android smartphone, and boot into recovery mode.
  2. Just straight install the Xposed Framework.zip file through recovery (download link at the end of post). After done, wipe dalvik cache and reboot your Android smartphone. Caution! This first reboot time might take a very loooooooong time (on my Samsung Galaxy V it need more less 30 minutes to 1 hour for this first reboot.
  3. After reboot, just install the Xposed.apk for the Android Lollipop up. And finally your Android Marshmallow smartphone is ready to rock with Xposed and the modules!
  4. If your Android phone suffer a soft brick or you want to remove xposed framework, then just boot back to recovery mode and try to flash (install) the Xposed Uninstaller.zip file.

Xposed + Framework Installer for Android 6.0 Marshmallow (SDK23) download link


The framework zip flashable are only for advanced users. If you don't have idea what hardware type your Android device is, then you can skip this section and READ DETAILED on XPOSED APK section

Choose the proper file based on your hardware type. Samsung Galaxy V is an ARM based device.

Xposed Framework.zip


Download: ARM | ARM64 | x86

Xposed Uninstaller.zip


Download: ARM | ARMv5 | ARM64 | x86

Xposed.apk


Update changelog:
V 3.1
- Material Design
- Download the correct framework ZIP for your architecture/Android version
- Install/uninstall Xposed directly from the app, no custom recovery required (but obviously you must still make sure that you can reflash your ROM in case something goes wrong!)
- Many changes under the hood for better stability, compatiblity and code quality

# XPOSED v. 3.1.apk (2.8 MB) | 16/10/2016


Check out the original thread by Rovo89 at XDA Forum.

Install Supersu [Chainfire] via CWM Recovery (Update Binary + Root) Android

Allright, before i have show you how to root, and install CWM recovery for our Android smartphone without PC. But i suggest you to replace the old supersu management app with more reliable and the mastermind behind supersu itself, it is with Supersu by Chainfire. I suggest you to replace your Android smartphone supersu management with Supersu by Chainfire because it is more reliable, more RAM will be saved, and it is had more language support (not like 360 root and Root Dashi / King root that had Chinese basic).

Besides, this tutorial is also to root your android smartphone for you who have installed CWM custom recovery via PC / Computer.

What we need :

* Already installed CWM custom recovery. If you have not, then you can read How to Install CWM recovery without PC / Computer.

* A zip file of CWM-Supersu v 1.9.4.zip


Steps install Supersu [Chainfire] via CWM


1. For you who had installed another supersu app like 360 Super Root, Root Dashi / King Root, and etc, you must delete the apps first.

2. Download file CWM-Supersu v 1.9.4.zip, place it in external sdcard.

3. Go to recovery mode. Turn off your android smartphone, then simultaneously press and hold the volume up+power+home button for about 5 second.

4. Now you are in recovery mode, choose "Install zip" --> "install zip from sdcard" --> find where you save the CWM-supersu zip file and choose it --> "...yes..." --> Go back and reboot your Android smartphone.

After the installation success, we can update the supersu and the binary by downloading Supersu [Chainfire] at the app market. When we open the updated Chainfire Supersu for the first time as it ask to update the binary, we can choose with "..CWM/TWRP..." (but via "Normal" too sometimes work for me). Then if we update the root binary of our Android smartphone, it will be more suitable for every new update of root-needed applications.

-> CWM-SUPERSU V 1.9.4.ZIP

-> How to Install CWM custom recovery without PC / Computer