Showing posts sorted by date for query root. Sort by relevance Show all posts

How to Hack Wi-fi Connection Using Android Phone


How to Hack Wi-fi Connection Using Android Phone
Wi-fi Connection


You want to test the security of your network? If the ancient times we need an operating system like Windows or Linux with a specific wireless network card to scan and hack wireless networks, now we simply use your Android device. The tool is available free of charge as long as your device is compatible. To note that the hacking router without permission is illegal. These steps should you use to test the security of your own network. See Step 1 below to find out how.
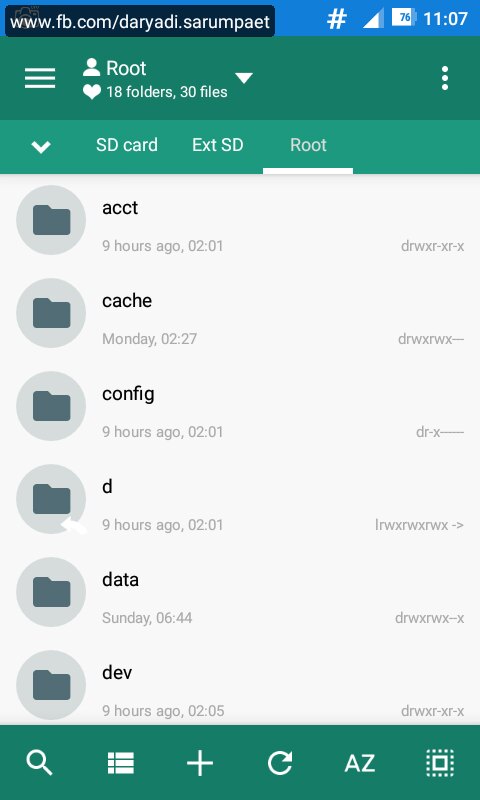
  1.    Root the compatible devices. Not every Android phone or tablet could pave the WPS PIN. This device must have a wireless chipset Broadcom BCM4329 or bcm4330, and should be rooted. Cyanogen ROM has proved the most up to this point.
  2.    Download and install bcmon. These applications enable Monitor Mode on the Broadcom chipset which is essential to pave the PIN. Bcmon APK file is available for free from bcmon page on Google Code website.
  3.    Run bcmon. Once the APK file is installed, run the application. Install firmware and tools if required. Tap Enable Monitor Mode option. If the application is suddenly broken, open it and try again. If this fails for the third time, your device will most likely not support.
  4.    Tap Run bcmon terminal. This will launch a terminal that is similar to most Linux terminal. Typeairodump-ng and tap the "Enter". Airdump will be loaded, and you will be taken back to the Command Prompt again. Tikkanairodump-ng wlan0 and tap the "Enter".
  5.    Define the access point wants to be hacked. You will see a list of access points available. You must select the access point using WEP encryption.
  6.    Record the MAC address appears. This is the MAC address for the router. Make sure you write the correct address if there are a few routers listed. Write down the MAC address.
  7.    Begin to scan the channels. You should gather this information from the access point for several hours before trying to hack the password. Type airodump-ng -c channel # --bssid MAC address ath0 -w output and tap "Enter". Airodump will begin scanning. You can let the device while scanning the information. Be sure to connect it to the charger in order not to run out of battery.
  8.    Hack password. Once you have the appropriate number of packages, you can try to hack the password. Go back to Terminal and type aircrack-ng output * .cap, then tap "Enter".
That’s article about How to Hack Wi-fi Connection Using Android
I hope it useful for you… Share This Article if you think this article may useful for others. Thank you

How to Accelerate Your Android Device

How to Accelerate Your Android Device

Android phones now exist almost everywhere ranging from low specifications to very sophisticated. Over time, each phone will be slower; This is why you must maintain the smoothness of the phone with a few simple steps in this article.
  1. Reset your phone. Arrange reinstall everything and restore your phone as before, which is "like new". This is a temporary choice, because when re-used phones will start to slow down again as usual. Back up contacts, memos, and other important information (such as passwords stored in the browser) before doing this step.
  2. Look internal memory space. The low internal memory could cause severe delays on the phone. Move media (images, mp3 files, video, etc.) to external memory such as SD cards. Some low- and moderate-specification mobile phones typically have a low internal memory, so move your files to the SD card will not help much.
  3. Root your phone. Root means giving more authority to the phone. Despite the risks of rooting, but the risk is not as big as before. Root process that failed to make the brick phones (eg malfunction). In addition, to root the phone will void the warranty. However, you can do unroot the phone (and cell phone warranty returns, because manufacturers cannot know if your phone is ever to be rooted before). Here is a list of things you can do after rooting your phone:
a.       Overclock the processor phones. This will ultimately speed up the phone but will consume more battery than before.
b.      Installing a special ROM. ROM is basically an Android version installed in the phone. Special ROM ROM is not official, but as part of a special ROM works better than the official ROM itself. Special ROM can solve many problems, including slowness and update the version of Android, but the solution is very technical, risky and not recommended, due to special ROM sometimes unstable, contain or eliminate damage to the official ROM features.
c.       Removing unwanted default application. Before you delete some applications, consider the following two points:
d.      Download the backup application, such as Titanium Backup to back up the application before deleting (just in case if you want to restore).
e.       Do not let you remove system applications, such as the launcher or the status bar.
f.       Perform root also gives you access to more technical applications, such as root call blockers, normal and notification ads blockers and root memory managers. Root memory manager is usually better than the auto task killer app.

Bring Up Menu Button on Android Device with Physical Button Running AOSP Based ROM

It's all begin when i changed my Samsung Galaxy V phone ROM to CyanogenMod 11 (Kitkat AOSP based ROM), I then found some issue finding a menu button in some application that gone missing. I got these "missing menu button" on some application like Firefox, Titanium Backup, Catlog, ePSXe emulator, etc.

What is menu button? Menu button is a three dot / three line icon (or using "Menu" text instead) usually placed on top of application user interface. It is used to access the main Menu preferences.

titanium backup menu button appears
Menu button appears

titanium backup menu button missing
Menu button gone

On ePSXe emulator, the menu is used to access the main options like cheats, graphic setting, and other quick preferences. The menu is can be accessed by pressing "back" key when I was using stock Touchwiz ROM of my Samsung Galaxy V phone. But after I changed my phone ROM to CyanogenMod 11 suddenly the "back" key changed to exit menu on the ePSXe emulator application. This also then became an issue when I was using some application like Firefox Browser, Titanium Backup, Catlog app, I can't found the menu button in the app!

What caused the menu button missing on applications on Android Kitkat AOSP ROM


The problem may occur because the differences designs of Samsung Touchwiz Android smartphone and AOSP based ROM. The Samsung Android smartphone which using Touchwiz as the stock ROM is designed with psysical / hardware keys button where it replaced the soft navigation keys (navigation bar).

On an Android device using soft navigation keys, the three dot / three line icons menu button appears beside the main navigation keys when it needed. But Samsung has modified the default by removed the soft navigation keys (navigation bar) and then move it to outside the screen as psysical (hardware) button.

android homescreen with navigation bar soft keys
Screenshot of navigation bar / soft navigation keys

And I think there are some Android application developer prefer to use this method, where it detect a Samsung Touchwiz ROM with psysical navigation keys it will show three dot / three line icon Menu button on the application user interface. But when it detect an Android smartphone with soft navigation keys it will hide the three dot / three line icon Menu button on application user interface, because a menu button already appear beside the soft navigation keys.

So when you change your Samsung (or other manufacturer) device ROM to AOSP based ROM like CyanogenMod, the application which prefer above method will be tricked to think that your device is an AOSP based ROM device with soft navigation keys.

Access the missing menu button on Samsung smartphones running AOSP Android kitkat based ROM like CyanogenMod 11


There are two options to bring menu button if you experiences condition like above on your Android device, it is by mapping menu button as additional keys to existing keys and the second option is by activate the soft navigation keys:

  1. Adding menu button as additional key function to existing keys


    The first option is done by adding additional function (where the additional function is Menu button). This happen when I was using CyanogenMod ROM on my Samsung Galaxy V. Just go to "Settings" -> "Buttons", now choose from the available button, example I choosed using the HOME BUTTON -> "Long press action", then set to "Open / close menu", done! So now we can call the Menu in application by doing long press on the Home button.

    buttons setting menu long press

    If the ROM you using are not give you the Button option on Settings (Buttons option is not exist), there is also another way to map the Menu button as an additional keys to existing keys by using Xposed module like Xposed Additions or Gravity Box. Read: Post about Xposed Additions module or Post about Gravity Box module.
  2. Activate the soft navigation keys (navigation bar)


    Well the second option is to bring up the soft navigation keys itself, which this will make your Android device screen to be cut a little. This can be done by modifying the system build.prop, so a file explorer/file manager with root ability is required.

    Find the build.prop file at root directory /system/. Edit the build.prop file, then search text for qemu.hw.mainkeys line, change the value to 0 so it will become: qemu.hw.mainkeys=0.

    edit build.prop qemu.hw.mainkeys

    If the "qemu.hw.mainkeys=0" is not exist on your build.prop file, then you must add it manually. Copy the:
    qemu.hw.mainkeys=0
    and paste it to the last line of your build.prop. Reboot your device. After reboot go to "Settings" -> "Buttons", scroll down and find NAVIGATION BAR section -> "Buttons and layout", from there you can assign the Menu key to be placed on the soft navigation keys / navigation bar.

    buttons setting menu navigation bar

Backup All Your Android Games and Applications to Your SD Card Using Titanium Backup APK

Do you like to change your Android device ROM? Or need to uninstall an application because you want try a new application or game because running out of space? Then Titanium Backup apk Android application is a must have Android application for you.

On the older post, I had share about the same kind backup application using Helium application APK. But i didn't satisfied with it because there are some application and game which failed to backed up by Helium. Read: How to Backup Android Phone Applications and Games Data using Helium APK.

Titanium Backup APK Android application is became "the ultimate root app" since several years ago. The main feature is we can backup our installed Android application and game APK and the data directly to phone storage or external SD card. It is very good especially if your phone does not have backup feature (i read there is some Sony phones which disabled backup feature).

Hey is backup Application is one of standard feature in Google Service which exist on the Android phone? That's right, but it need to upload the application's data to the Google server which will cost you time, energy (battery), and even money if you use it through mobile network. And moreover, if you uninstall the Android application or game then you need to re-download it first from Play Store before you can restore / download the Android application data.

Titanium Backup APK Android application can backup every Android application and game directly to phone storage or external SD card, we can change where the backup should be saved in the preferences. The advantage, that Titanium Backup also will backup the .apk file of the Android app or game. So we can restore the backed up Android application or game exactly just like when we backed it up from save data, setting, even to the smallest part will be backed up.

titanium backup android application main interface

titanium backup android application game list

Titanium Backup APK Android application features


Just like I said above, backup Android application and game is just the main feature of Titanium Backup APK. There are dozens other features from this Android application like:
  • Uninstall bloatware (system application)
  • If we have updating an Android Application or game and we had backed up the older version, we can downgrade the application.
  • Backup and restore phone important data like browser bookmarks, phone, sms, etc to and from a .xml file.
  • Integrate system application update to ROM so it can conserve more free storage in your phone.
  • Extract and restore application from a nandroid backup.
  • And many more...
Of course all that flashy features need a ROOT present on your Android device. And also some additional feature can be unlocked by purchase the Titanium Backup Pro addon on the Play Store.

Titanium Backup APK Android application download link


MiXplorer APK - Best All in One File Manager Android Application Download

MiXplorer is an advanced file manager / explorer application for Android device. The app is created by one of senior member on XDA Hootan Parsa. This is the best file manager application I ever used on my Android smartphone I think. It have many great and usefull features you will not find on others file manager. It also support start from the old Android E (Eclair)!

MiXplorer is full featured file manager / explorer created by Indie developer HootanParsa, for Android device. This application is adfree, is, and will always remains that.

MiXplorer has been my regullar file manager untill now, since I saw it on XDA and try it then i start to love it. It have all-in-one features yet with simple and easy to use user interface. I like this file manager because it's multifunction, I can do many different tasks in MiXplorer app so no need to open different applications which speed up my work on my Android smartphone.

MiXplorer APK file manager Android application is also have inbuilt theme / skin chooser. Even you can create your own skin with your own colors. So we will not boring when using it as we can often change the theme / skin.

Some special features on MiXplorer like archive manager and PDF reader is required us to download the right plugin for our Android device (download plugin link is also available inside the app menu). To download additional plugins for adding additional features, tap the "three dot icon" on top bar -> "Settings" -> "Add-On", tap on "Add".

mixplorer file manager android application user interface

mixplorer file manager android application transparent background

mixplorer file manager android application storages path option

mixplorer file manager android application add cloud account

Some briefly features featured on MiXplorer Android application file manager


  • Root access for all advanced operations.
  • Powerful Text Editor.
  • Built in MP3 Tag Editor.
  • Easily themable with customization option which lets you select any color you like.
  • Unlimited Tabbed browsing and Dual panel in landscape mode and Drag and Drop between panels also supported.
  • Easily create Tasks to multitask Copy, Move, ... operations.
  • Sort, disable and enable all menu options and action buttons.
  • Customizable bookmarks drawer with essential file types already categorized.
  • eBook reader which supports PDF, Epub, Xps, Cbz and multipage Tiff images.
  • Different various View Modes and Sorting Options for each folder separately!
  • Advanced search functions.
  • Extract and create 7z and Zip/Zip64 (splitted-encrypted), TAR, TAR.GZ, TAR.BZ2, GZIP, BZIP2
  • Extract RAR/RAR5 (splitted-encrypted), XZ, APM, CAB, ISO, ARJ, AR, LZH, LHA, CHM, MSI, WIM, Z, CPIO, RPM, DEB, NSIS, LZMA, NTFS, FAT, VHD, MBR, SWM, MSLZ, CramFS, Dmg, ELF, MachO, Mub, PE, Split, Xar, Z, Udf, HFS, SquashFS, PPMD.
  • Custom USB OTG driver. FAT32 (R/W), exFat(R/W), NTFS (R).
  • Html viewer which supports MHT, Markdown, AXml and ....
  • Export/Import all preferences and bookmarks and customized skins.
  • All your cloud storage needs accessible from one single app. Choose from 19 providers: Amazon CloudDrive, Mega.co.nz, Mail.ru, Dropbox, Box, Yandex, HiDrive, Baidu, Mediafire, IDrive, Hubic, 4Sync, 4Shared, Google Drive, Meo, OneDrive, pCloud, SugarSync, VDisk.
  • + clouds which support webdav like (Yandex.ru, OwnCloud, MyDrive.ch, DriveHQ, CloudMe, CloudSafe, ...).
  • Modifying zip files.
  • User and System app management with data backup ability for rooted devices.
  • EncFS volumes supported for all storages.
  • File encryption and decryption using Aescrypt file format.
  • FTP/HTTP Server built in + TCP server to receive files from other devices using MiX (Send-to option).
  • Built-in Image Viewer (it supports GIF animation and large images).
  • Built-in Media Player + VLC codecs add-on.
  • SAMBA, FTP, SFTP, WEBDAV, BLUETOOTH supported as well.
  • And many more awesome features for you to explore!

Mixplorer APK Android application update changelog


  • v6.10.6.BETA_B1612172
    - Fixed HTTP server authentication.
    - Fixed opening SMB shortcut folder.
    - Fixed compressing 7z with Store level (Add-on updated).
    - Fixed FC when touching edit boxes or scrolling dialogs.

MiXplorer APK Android application download link


# MIXPLORER v. 6.9.6.apk (1.6 MB)

# MIXPLORER v. 6.10.6.apk (1.6 MB)


Visit original thread by HootanParsa on XDA Forum.