Showing posts sorted by relevance for query Lucky patcher. Sort by date Show all posts

Lucky Patcher APK + Tutorial Android Application Download

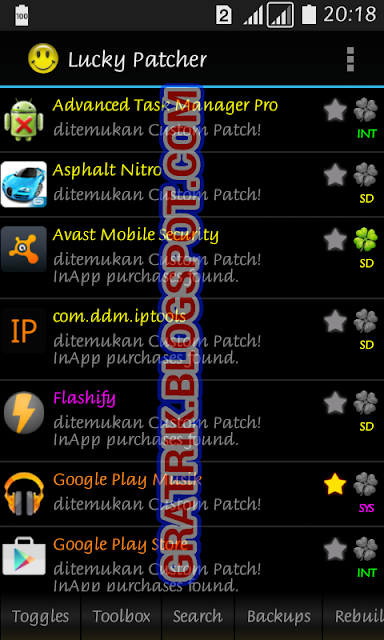
Lucky Patcher apk is an app mainly created for rooted Android smartphone developed by Chelpus with some great feature in it. Well this app is pretty popular in the Android underground world because it can hack (or crack) applications and games so we can hack for free in-app purchase, remove advertising, remove the app's license verification, and some other great feature. It's a one-stop-hack app solution :D. Beside great benefits in it, Lucky Patcher also have some negative risks like bootloop, system unstable, etc, so backup is suggested. But after one year using it, my phone is going okay no problem using it.

This is 3 main feature that made Lucky Patcher app becoming very popular today:
- In-app purchase hack (we can get item, buy stuffs, in app or game for free, wow!)
- Remove annoying ads in apps
- Remove Google license verification from an app.

The following requirement is needed to operating Lucky Patcher app:
- Rooted Android smartphone
- Android version 2.0 or up
- Little knowledge about Android phone
- Backup, if you needed
- Brain :v
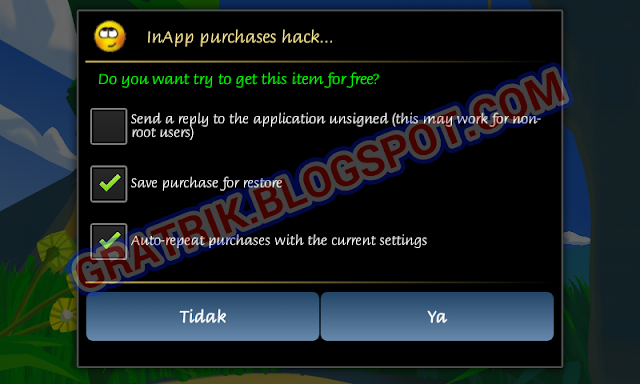

How to activate hack free in app purchase in apps or games using Lucky Patcher

  1. Open Lucky patcher.
  2. Tap "Switches".
  3. Tick "Google billing emulation", just make sure the switch become green.

How to block ads on all apps and games using Lucky Patcher

  1. Open Lucky Patcher.
  2. Tap "Toolbox" -> "block ads" -> "block ads on device"
  3. If you experience some errors on Play Store, Play Game, etc, Go to "Toolbox" -> "block ads" -> "clear the local host file"

How to activate License Verification hack in Lucky Patcher

  1. Open Lucky Patcher
  2. Tap on "Switches"
  3. Tick "Google license verification emulation


After the targetted hack toggles have been activated, now the second steps is we must apply the Lucky Patcher patch on app that you want to hack on it:
  1. Open Lucky Patcher and search and choose the app / game -> "Open menu of patches".
  2. Choose what you want to be hacked on it, is it the in-app purchase, license verification, etc. There are also some patching method to choose, for this one you need some experiment or ask someone expert who had patch that apps / game.
  3. There are also some optional options when patching like backup apk file just in case, apply patch to dalvik cache (this help so the patchs could survive better), etc.
  4. Apply the patch!
  5. Now open the app for test it :). Remember, different app may will need different patching method, so if you must experiment yourself or ask someone expert to choose the patch method.

If you have Xposed Installed, it can even easier to apply Lucky Patcher to every app. Just activate the Lucky Patcher patch plus in Xposed module, and go to Lucky Patcher, open the top bar menu -> "Xposed setting" -> Choose what patch you want to apply, and it does not need manual patch on every app anymore.

All credits to:
- Chelpus and Developers of lucky patcher android application
- google.com

Lucky Patcher apk Android app updates changelogs:
  • v. 6.0.7
    - Update translate
    - Update custom patches
    - Bug fixed
  • v. 6.1.5
    - Fix android patch for “Disable signature verification in the package manager” for CM13 arm
    - Translation updated
    - Custom patches updated
    - Bugs fixed.
  • v. 6.4.4
    - Update modded Google Play to 7.3.07.K
    - Update Android patches for arm
    - Update custom patches
    - Update translations
    - Bugs fixed

Lucky patcher update android application version history download link


If you are updating from an older version of Lucky Patcher, it is recommended to uninstalls it first before installing the newer version.

How to ODEX your Android Devices ROM using Lucky Patcher App

If you know so many custom ROM for your Android devices and you ever install them, maybe you will notice that the ROM is on deODEXed state. Maybe the developers is deliberately did it to get some conditons for the users, like so it can be easily modded. Now here is tutorial how to ODEX your deODEXed Android devices ROM using Lucky Patcher app.

Some of Custom ROM i share for Samsung Galaxy V SM-G313HZ on this blog like Zentouch, HiTech, etc. is a deODEXed ROM too.

What is ODEX, deODEX, and the Benefits of each of them.

Requirements:
* Rooted.
* LUCKY PATCHER Android app.
* Backup (If you feel need it).
* Brains :v


Why we should / need using ODEX ROM in our Android smartphone


  • ODEXing you ROM will bring more space in the internal memory. Because in ODEXed ROM, the system app Dalvik Cache will moved / remained to the system partition.
  • It's up to you, if you love mod your Android smartphones using Apktools, it's better keep your ROM in deODEXed state. Because in the ODEXed ROM we can not get the smali folder in the apk file.
  • If we just an casual user of Android smartphone (like me :D ) and have no intend in playing with apktool and modding the system, it's better for us to use the ODEXed ROM because it more stable.
  • For you who like gaming, then this guide is right for you. Because using a deODEXed ROM in your Android smartphones will eat more RAM and more or less will affecting the game performance.

Steps how to ODEX your Android smartphones ROM without PC using Lucky Patcher app


To get maximal result, make sure you have 100 MB or more of empty space on your /system partition device. You can check it using disk monitoring app like DISK INFO PRO.apk. If you feel you have too little empty space on your system partition devices, you may want to delete some unused system app first.

How to Delete Bloatware / System Applications on Android Devices.

  1. Download dan install the Lucky Patcher.apk app.
  2. Open the Lucky Patcher app, go to "Toolbox" -> "ODEX all system apps...", and wait untill the process done.
  3. Done! Reboot your Android smartphone (or reboot automatically).


Inspired by :v : GalaxyVarchive Blog

How to Disable APK and Package Manager Signature Verification Using Lucky Patcher

Have you experience when installing an application and fail with message "app not installed" ? Maybe and maybe, it could be not the apk is corrupt, it could be the problem is with the signature verification process.

The problem can come from an apk if an apk is not the originall one, if it has been modified the signature verification will fail you from installing it. Or when you try to install an apk with older version than the installed one, the installation will also maybe fail.

Quoted from XDA developers:

"If you obtain an APK from outside of the Google Play Store and attempt to install it as an update to your currently installed app (read: same package name), the OS will attempt to validate the application’s certificate to make sure that it came from the same initial developers. If the certificate matches, the application install will
proceed as planned, your application will retain its existing data, and all is gravy. If the signature is not valid (indicating that the APK has been tampered) or if the certificate does not match that of the original app, the installation will fail."


Now here is an easy way to "force" the app / apk to be able to installed in our Android device.

Requirements:
- Rooted
- Lucky Patcher.apk app.


Step to solve "application not installed" caused by signature verification problem


FIRST OPTION (if you already install Xposed)

This first way is more safe / reduce the brick chance of our Android device system, but it is required the Xposed installed. You must already Install the Xposed Framework, then activate the "Lucky Patcher +" module in xposed.

  1. Open Lucky Patcher.
  2. Tap on "Toolbox" -> "Xposed settings".
  3. Check the "Disable .apk signature verification" and "Disable signature verification in the package manager".
  4. Apply changes, done.

SECOND OPTION (do some patch to our Android device system)

  1. Open Lucky Pather.
  2. Tap on "Toolbox" -> "Patch to android".
  3. Check the "Disable .apk signature verification", then apply changes. After this maybe your smartphone will reboot automatically, if not continue to next step.
  4. Still in the Patch to Android, then check the "Disable signature verification in the package manager", Apply changes, done (May reboot automatically).


If after doing this the application or game still gave same result: "App not installed", then the problem maybe not caused by the apk signature, maybe the apk is corrupt either not supported in your Android smartphone device.

How to Play Nintendo DS (NDS) Games on Android Smartphone using DraStic APK

Nintendo DS (Dual Screen) or NDS is famous mobile gaming console owned by Nintendo Corporation. There is few Nintendo DS emulator app put there, but the performance is very sucks, and one of the best with good speed is DraStic Emulator.

Nintendo DS is a first ever handheld gaming console that have touchscreen feature in it. The console itself have two screen, one at front and one at bottom with buttons, so player can interact with screen by touchscreen not only by pressing button like the competitor at that time (Son*). For me Nintendo DS game is a must try by every gaming freak on mobile especially Android phone cause it have this following points:

* Small game size, rately the NDS iso file games are under 300 MB.
* Because it based on gaming console, so you can expect long hour gameplay duration on every game.
* Cute and nice graphic like a transition between GBA (Gameboy Advance) and PSP. We even can improve the graphic by "3D enchanced resolution" in the emulator video setting.
* Wide gameplay games and variety is the most advance point on Nintendo DS games. Even some game title is exclusively released only for Nintendo DS.
* Huge game series. Let just say about Harvest Moon series, it have more than 5 title, and Final Fantasy series it have Final Fantasy I to VI + Final Fantasy XII Revenant Wings (exclusive only on NDS), and don't forget about the Pokemon series.

To play Nintendo DS games on DraStic emulator, we will need the ROM iso game file that on .nds format. You can easily find it free at retro gaming websites.

This DraStic NDS app is also already have inbuilt cheat feature in it so you cheater can play the games easily ( just don't cheat your girlfriend hihi :D ), graphic setting, save states and many more option to enchance your Nintendo DS gaming experience. And it also have external controller support.


How to remove license verification (if you found):

1. Install the DraStic.apk app while you offline.

2. Download and install updated Lucky Patcher.apk app.

3. Open Lucky patcher, turn on switch "google license verification emulation" (see at Lucky Patcher tutorial for more info), after that choose the DraStic app in Lucky Patcher.

4. Choose "Open menu of patches" -> "Remove license verification" -> "Auto Mode" -> check: "Auto Mode (Inversed)", "Other patches", "Remove dependencies", "Apply Patch to dalvik-cache", apply patch and wait. After done open the DraStic app and ta-da ! :) Run your Nintendo DS games.


If your Android smartphone is not rooted yet (or you are lazy :D ) you can download and try the "prepatched" apk one, but it's older version so the performance and features may not as good as newer ones.

Drastic Apk Nintendo DS Emulator Download Link


What's new:
v. r2.4.0.2a (08/3/2016)
* Improved stability on certain Android devices
* Fixed non-standard external controller support
* Fixed some audio problems in homebrew
* Fixed cheat folder description not showing properly
* Fixed external display

# DRASTIC DS EMULATOR v. r 2.2.1.1 a.apk pre patched

# DRASTIC DS EMULATOR v. r 2.4.0.1 a build 82.apk (+- 11.8 Mb) | 01/12/2015

# DRASTIC DS EMULATOR v. r2.4.0.2a.apk (+- 11.9 Mb) | 08/3/2016

7 Reasons That Will Make You Want to Root Your Not Rooted Android Device

Android, the open source project mobile system operation is have fast progress in it's development. But there is one thing cannot be separated from Android OS is it the old Android version or even to the most new Android N Nougat, and it is ROOT.

As we know Android is an open source operating system, so we have rights to modify the system as we like. By Rooting our Android device is the way we can unlock "the security seal" of the device so we can through the deep of the system. Actually for honest, Root is something that every user should not do so easy to his device. As for a rooted device can also bring user some serious trouble like bricking it, to the most important things like security and privacy of the user.

rooted android break chain

Also although Root is something that can void the warranty of an Android device, but still most user will do it anyway as there is so many benefits and advantages they get. But nowaday there is so many information we can get on websites tell us how to Root our Android device easily, and even there is solution to prevent if something bad happen when we did a failed Root.

My myself start Rooting my first Android smartphone Samsung Galaxy V SM-G313HZ when it still 3 months old in my hand. You know what is the first reason why I brace myself to rooted my Android smartphone at that time? To get internet access for free (oopss...) :D.

Now here it is, the 7 reasons that will make a user to root his Android device.

  1. Performance and Function Tweak


    When I just got my first Android smartphone, I'm very happy with it. The first game i was hunting is Final Fantasy III, then I playing it and "awesome". Then i knew that GTA game is also playable on Android, but with size 2 GB, but my phone storage is just 2 GB :( . But there is solutions to trick it, move the data and obb of game to external SD card (which usually have great space like 8 GB, 16 GB, 32 GB, etc...) using some applications like Foldermount or some Xposed module like XinternalSD. And guess what? That's right, the applications is need ROOT :D.

    Also with Rooting your Android device, we can do many things to boost the device performance. There is many ways we can improve the performance of our device like removing unnecessarry bloatware (system applications), using some Init.d scripts, applying tweak to the RAM, and many more.
  2. Better Gaming Experience


    Playing game on Android device is also had many variations too. From Playing the usual Android game to playing some old school games like Playstation Portable using emulator application. One more reason to root your Android device for you who are gaming freak, to get more performance on the game and maximize your gaming experience.

    final fantasy iv the after years android game ceodore vs boss

    Let me give you a hints about the best Android application to maximize your gaming experience, and it is GLTools. By using GLtools application, you can enchant the graphic or even reduce lag and quality so you can play hind end game on an low end Android phone.
  3. Change Display and User Interface


    One the most reason why users root his Android device, it is to change the display and User Interface (UI). Yeah, we can change the color, the statu bar icon like clock, battery, change the Settings background with your girlfriend photo, or even fake the signal to 4G even you use a 3G phone :D.

    There is also many ways to do it, and one of the most popular method is using Xposed module as it is fairly easy to use and not too risky. Some popular Xposed module to modify the User Interface: Wanam Xposed (mainly for Samsung Touchwiz Kitkat), Xblast Tool (for Kitkat and down), or GravityBox (available for Android Jelly Bean to Marshmallow).
  4. Stay Up to Date


    Every Android device of course will get system update from the device Vendor. The update can include of Android OS version or even small updates to fix some minor bugs. But I'm sure an Android device will soon stop getting the official updates as more and more new device released. If we want, we also can take an act to update the system or OS version by ourself.

    Like my Samsung Galaxy V Android smartphone, now i'm running it with Android Marshmallow which originally released as Android Kitkat, although it never get official update from the manufacturer. To do that, I am installing an aftermarket firmware created by third party (non-official) and flash it by myself. It is often called installing a "Custom ROM".
  5. Change ROM


    Like I said above, by Installing a custom firmware or custom ROM (the right one of course...) we can update the OS version. But just not that, by Installing custom ROM is like a total modification also to the Display, performance, new features, and many more.

    custom roms on android

    To install a custom ROM, we need a custom recovery. And root is the only way if we want to install a custom recovery directly and using it by our Android device.
  6. Backup and Restore


    Now this also one more things that pretty important, to easily backup and restore of our Android device content. Actually Google also has offer you a service to backup your device to the Google Drive cloud. But it needs a lot of time and bandwith of course.

    If we have a rooted Android device, we can easily backup it's whole content from the applications, system, the apk's and anythings directly to our external storage, so no computer needed. There are many apps on the market that offer to do that, example the best is Titanium Backup and Helium.

    Or even we can make a full backup of our Android device content and system using the Backup feature on custom recovery like TWRP, CWM, etc as easy as "one tap".
  7. Hack 2 Free and Hack 2 Win :D


    Last but not least, is a bad reasons that is we can get premium / paid Android app or game for free. Or just hack an in-app-purchase of an application or game to get some premium features for free. It need some hacking jobs and some right tools like Lucky Patcher, which need root access of course.


    And also we can hack an Android game like the money, the gold, similar like that if we have root access because the system is already unlocked so we can make changes to everythings.

Like I said earlier, rooting your Android device is something you must think twice before to do it. As we get many benefits, a rooted Android device is also could bring us some trouble including bricking it or some serious trouble about your privacy and security.

I think rooting our Android device is ok if we know what app and what kind of jobs the root application will do to our Android device. And choosing the rights Superuser management app is also an important thing so you can keep your privacy and security safe.