Showing posts sorted by relevance for query xposed framework. Sort by date Show all posts

Xposed Framework Installer for Android 5.0 and 5.1 Lollipop / CM12.1 ROM

Back with another post about Xposed :v. What should i say? Xposed is a really great invention on Android platform, i really depend on it, more over to the Xposed Additions module to remap my screenshot button. Yeah, with Exposed Framework Installer and Xposed Additions module, now i can take screenshot in my Android smartphone with only holding the 'volume down' button.

Now i will share Xposed Framework Installer for you who used Android phone with Android version 5.0 and 5.1 version. The xposed for Android Lollipop and Marshmallow still developed by Rovo89@XDA and tungstwenty@XDA. The development actually is just on ALPHA-4 state. But I already used it on my Samsung Galaxy V with CM12.1 ROM and it's good no issue found. But beware this is still ALPHA-4 state, and i only try this on CM12.1 ROM, so different device, different ROM, maybe will bring different result.

Requirements
* Custom recovery installed. TWRP is recommended
* Xposed Framework zip flashable, apk, and Xposed Apk for Lollipop up version (download link in the end of post)
* Backup
* Brain :v
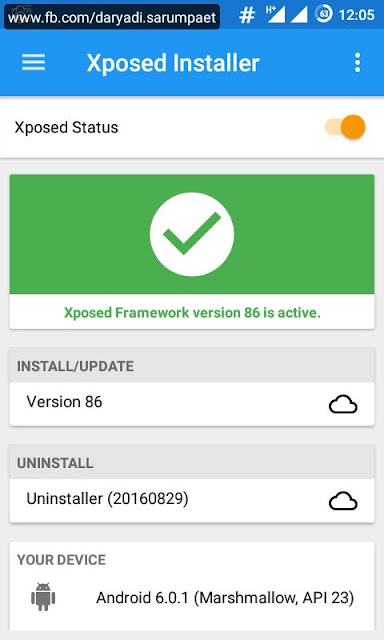
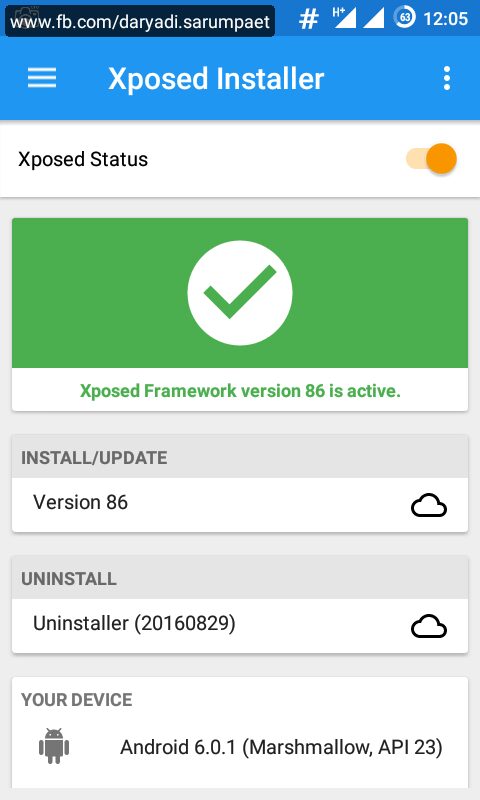
xposed v 3.1 for android lollipop and marshmallow up

How to install Xposed Framework Installer on Android Lollipop (tested on CyanogenMod 12.1 ROM


  1. Power off your Android smartphone, and boot into recovery mode.
  2. Just straight install the Xposed Framework.zip file through recovery. After done, wipe dalvik cache and reboot your Android smartphone. Caution! This first reboot time might take a very loooooooong time (on my Samsung Galaxy V it need more less 30 minutes to 1 hour for this first reboot.
  3. After reboot, just install the Xposed.apk for the Android Lollipop up. And finally your Android Lollipop smartphone is ready to rock with Xposed and the modules!
  4. If your Android phone suffer a soft brick or you want to remove xposed framework, then just boot back to recovery mode and try to flash (install) the Xposed Uninstaller.zip file.

Xposed + Framework Installer for Android Lollipop download link


The framework zip flashable are only for advanced users. If you don't have idea what hardware type your Android device is, then you can skip this section and READ DETAILED on XPOSED APK section.

Choose the proper file based on your hardware type. Samsung Galaxy V is an ARM based device.

Xposed Framework.zip

  • -> Xposed Framework.zip for SDK21 (Android 5.0 Lollipop)
    Download: ARM | ARM64 | x86
  • -> Xposed Framework.zip for SDK22 (Android 5.1 Lollipop / CM12.1 ROM)
    Download: ARM | ARM64 | x86

Xposed Uninstaller.zip


Download: ARM | ARMv5 | ARM64 | x86

Xposed.apk


Update changelog:
V 3.1
- Material Design
- Download the correct framework ZIP for your architecture/Android version
- Install/uninstall Xposed directly from the app, no custom recovery required (but obviously you must still make sure that you can reflash your ROM in case something goes wrong!)
- Many changes under the hood for better stability, compatiblity and code quality

# XPOSED v. 3.1.apk (2.8 MB) | 16/10/2016


Check out the original thread by Rovo89 at XDA Forum.

Xposed Framework Installer for Android 6.0 Marshmallow / CM13 ROM

Allright, now here is the official Xposed Framework Installer for you who use phone with Android 6.0 Marshmallow version. This Xposed for Marshmallow has been tested by me on an unofficial CyanogenMod 13 (CM13 ROM) on Samsung Galaxy V SM-G313HZ, and work like a charm.

As we know, the Xposed for Android Lollipop (SDK21 and SDK22) and Marshmallow (SDK23) is different from Kitkat version. The installation of the Framework must be flashed through recovery mode (TWRP recommended). Untill now, the development of Xposed by the developer Rovo89@XDA is still going on and already come to ALPHA state.

Requirements:
Rooted
Custom Recovery installed
• Considering backup

xposed v 3.1 for android lollipop and marshmallow up

How to install Xposed Framework Installer on Android Marshmallow (tested on CyanogenMod 13 ROM)


  1. Power off your Android smartphone, and boot into recovery mode.
  2. Just straight install the Xposed Framework.zip file through recovery (download link at the end of post). After done, wipe dalvik cache and reboot your Android smartphone. Caution! This first reboot time might take a very loooooooong time (on my Samsung Galaxy V it need more less 30 minutes to 1 hour for this first reboot.
  3. After reboot, just install the Xposed.apk for the Android Lollipop up. And finally your Android Marshmallow smartphone is ready to rock with Xposed and the modules!
  4. If your Android phone suffer a soft brick or you want to remove xposed framework, then just boot back to recovery mode and try to flash (install) the Xposed Uninstaller.zip file.

Xposed + Framework Installer for Android 6.0 Marshmallow (SDK23) download link


The framework zip flashable are only for advanced users. If you don't have idea what hardware type your Android device is, then you can skip this section and READ DETAILED on XPOSED APK section

Choose the proper file based on your hardware type. Samsung Galaxy V is an ARM based device.

Xposed Framework.zip


Download: ARM | ARM64 | x86

Xposed Uninstaller.zip


Download: ARM | ARMv5 | ARM64 | x86

Xposed.apk


Update changelog:
V 3.1
- Material Design
- Download the correct framework ZIP for your architecture/Android version
- Install/uninstall Xposed directly from the app, no custom recovery required (but obviously you must still make sure that you can reflash your ROM in case something goes wrong!)
- Many changes under the hood for better stability, compatiblity and code quality

# XPOSED v. 3.1.apk (2.8 MB) | 16/10/2016


Check out the original thread by Rovo89 at XDA Forum.

Xposed Framework Installer APK - Android Application Download

Xposed Installer is an Android application for rooted Android smartphone to adding a framework and we can install the modules for it to boost our Android device performance, change the appearance (color, icon, font, etc...), and another great function. Xposed is made by Rovo89@XDA and Tungtstwenty@XDA. To know more about xposed and how it works, you can visit the xda developer forum.

Quoted from the developer:

"Xposed is a framework for modules that can change the behavior of the system and apps without touching any APKs. That's great because it means that modules can work for different versions and even ROMs without any changes (as long as the original code was not changed too much). It's also easy to undo. As all changes are done in the memory, you just need to deactivate the module and reboot to get your original system back. There are many other advantages, but here is just one more: Multiple modules can do changes to the same part of the system or app. With modified APKs, you to decide for one. No way to combine them, unless the author builds multiple APKs with different combinations."

Xposed need Android version 4.0.3 up to 4.4. The Android Lollipop and Marshmallow version is still on developing progress untill now.

Steps to install Xposed Framework Installer for Android


  1. Make sure that your Android device is on rooted.
  2. Download, install, and open the Xposed Installer.apk, don't forget to grant it superuser rights if asked.
  3. Tap on "Framework", and then tap "Install / Update" to begin install Xposed on your Android smartphone device. After done, reboot the device.

  4. Allright, we now just need to install the modules for xposed. The modules is basically just a normal APK file like other application, you can choose which one you need and compatible with your Android device. Choose wisely because there is a million of Xposed modules out there :v . Again, you can visit the xda forum to get more information about Xposed modules.
  5. Install the module, and then open the Xposed app. Tap on "Module" and activate it by check it. Reboot your Android device, and the module is ready to rock and roll :v .


Xposed Installer Version History Android Application Download


# XPOSED INSTALLER v. 2.6.1.apk


-> Xposed Framework Installer for Android Kitkat 4.4.4 / CM11 ROM

-> Xposed Framework Installer for Android 5.0 Lollipop up / CM12.1 ROM

-> Xposed Framework Installer for Android 6.0 Marshmallow / CM13 ROM

Best Xposed Theming App Module for Android I Ever Used [Xposed]

One amazing thing we can do on our Android device if we have Xposed installed, is we can modify and change the system theme (colors, transition effect, etc). The best is because it take advantage of use of Xposed framework and it means the look of our Android device system is changed without touching the apk of system. All changes is safe as it been made on memory and can be easily reverted back just by deactivate the module from the Xposed app.

There are many modules created by for theming our Android device out there. This is a great way for users who want / like to modify Android device looks and view but do not have coding skill or do not want to messy with apk decompiling-recompiling, just like me :D . Now here it is the 5 best Xposed module theming app for modifying Android device system User Interface, version www.indophoneboy.com.

  1. Wanam Xposed by "Wanam"


    Wanam Exposed is a great utility Xposed module Android application for tweaking Android system User Inteface, made especially for Samsung Touchwiz ROM based phone. We can change and modify the status bar, tweak the system menu like power menu, change background, change colors, etc. Wanam Xposed is have 2 version, for Samsung Android 4.2+ and for Samsung Android 5.x+. Its working best environment on a deodexed ROM.

    wanam xposed android module user interface

    Although mainly created for Samsung Touchwiz based phone, its not closing possibility to work on other Custom ROM though the compatibility might not be guaranteed. Head to the official thread of Wanam Xposed on XDA Forum.

    -> DOWNLOAD WANAM XPOSED MODULE.apk
    For Samsung Android 4.2+ (1.8 MB) | For Samsung Android 5.x+ (1.1 MB)
  2. Xblast Tools by "FemBlack"


    Xblast Tools is another great theming Xposed module for Android device. Based on my experience when used it, it is have no different purpose with Wanam Xposed, except Xblast Tools is created to serve for universal Android phone and ROM's starting from Android 4.0.3 and up. Check the thread by "FemBlack" on XDA Forum.

    xblast tools android xposed module user interface

    -> DOWNLOAD XBLAST TOOLS XPOSED MODULE.apk (6.1 MB)
  3. Android Theme Engine / Ex-Themer by "vishal11in"


    For the third entry, there is Android Theme Engine. Also there is 2 different name of this Xposed module but it looks it have actually same purpose and I can catch it because its created by same developer. Android theme Engine is created for more universal Android version from JellyBean, Kitkat to Lollipop, while Ex-Themer is created for Android Kitkat.

    android theme engine xposed module user interface

    What differencing Android Theme Engine and Ex-Themer from Xposed theming app i said above is they have a custom template selection option, which it can make total modification to the system theme and colors by applying from a template inside it (of course partially modification is still exist for you to use). Unfortunately, the compatibility is restricted to only AOSP (Android Open Source Project) based ROM and some popular Android phone only. Read more on the official thread on XDA Forum.

    -> DOWNLOAD ANDROID THEME ENGINE XPOSED MODULE.apk
    Android Theme Engine.apk (10.6 MB) | Ex-Themer.apk (for Kitkat) (2.7 MB)
  4. GravityBox by "C3C076"


    Now this is one of my favorites Xposed module, GravityBox. Actually the "theming" modification feature is almost no exist in this app. GravityBox only created to make some minor modification to the Android system framework like changing the status bar elements, navigation bar elements, power menu, key function tweak, etc. Still I like this Xposed module because it never fail on every ROM i have used and it support from Android Jelly Bean to the Android Marshmallow.

    -> READ MORE ABOUT GRAVITYBOX XPOSED MODULE.
  5. MonsterUI by "KuaQ"


    For the last one, there is a simple and great Xposed theming app for Android called "MonsterUI". The idea of MonsterUI is to theme Android framework style and colors to be a Lollipop Material style. This Xposed module is can work on every ROM's, but all the features and compatibility is working best on AOSP based ROM I think.

    -> READ MORE ABOUT MONSTERUI XPOSED MODULE.


All the Android Xposed module is available on repo.xposed.info. Consider DONATIONS to the developer if you think the application is usefull.

5 Cool & Usefull Xposed Modules on Daily Usage for Your Android Device

Xposed is one of great app ever developed for Android platform. If you don't know what or for what Xposed is, then you are not an Android modder. It can be a prove too, if your friend say he is an Android modder but when you ask what is Xposed to him and then he doesn't know, then he is lying :D .

Actually the Xposed itself is didn't do anything real to your Android device. Xposed is adding a framework to your Android device / smartphone, then through the framework we can do unlimited possibilites using the needed applications which is called the "modules". And it don't take high risk to make modification on our Android device using the modules as every changes is done on the memory and can be easily reverted back just by deactivate the modules on the Xposed configuration.

xposed and android

The advantages of using xposed is: It don't require modification to system, not dried your RAM, and not exhaust your Android device CPU resources.

Now for you who are new to Xposed world, i can give you some of my preffered best Xposed modules that is very usefull. In unordered, the 5 Cool and Usefull Xposed Modules on Daily Usage for your Android Device version indophoneboy.blogspot.com.

  1. Native Clipboard (by "dhm47")


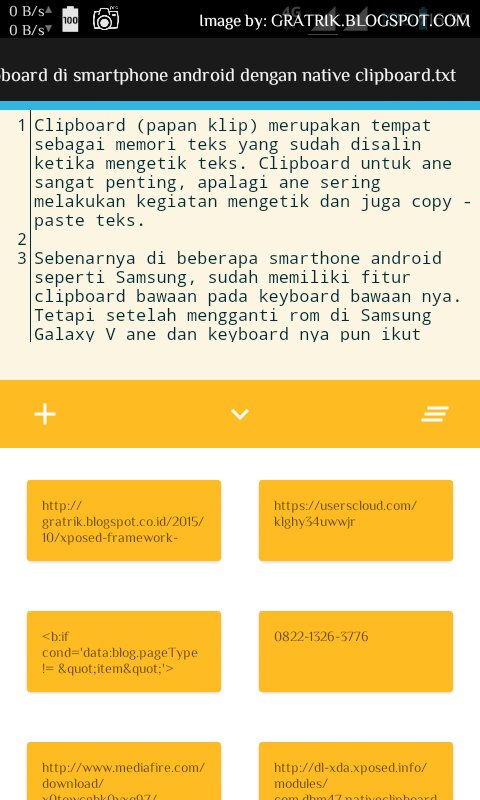
    Native Clipboard is great module and the best method to add clipboard funtionality to your Android device. Besides it small size and simple user interface, you will find rich features and customization which make this xposed module be the best Android application for you who are looking a clipboard functionality when typing on your Android device / smartphone.


    Native Clipboard module work on every Android version which Xposed supported, from Android Kitkat to the newest Android Marshmallow. This application is also had many have many methods you can select to how the clipboard should be summoned.

    Read more info about Native Clipboard Xposed module application.
  2. XinternalSD (by "pyler")


    Do you have an Android smartphone / device with small internal storage size, but you want to install games with huge size? Or do you want to move the data or obb application from internal storage to external SD card? You just need do one thing, and it is to install the XinternalSD Xposed module.


    XinternalSD can change the application / game storage access behaviour by reditect it to external SD Card. This module even can fix the external SD card on Android Marshmallow to become full writable by default, so you no need to format the external SD card as internal to get the full write access.

    Read more info about XinternalSD Xposed module application.
  3. Xposed Additions (by "Spazedog")


    Xposed additions is the great module which mainly funtioned to remapping or even add a new function to your Android device button / key. This is a great application moreover if you had broken key / button on your Android device, so you can remap other button to replace that button.

    xposed additions select key button to remap

    Not only change your Android device key function, Xposed Addition module is also can add new function through the long click on a key / button.

    Read more info about Xposed Addition module application.
  4. Stay Awake (by "92lleo")


    It is annoying when I'm playing Android games on My Android device the screen is going to sleep. Of course it not efficient, I must keep press the button just to make the screen is not off. Although some Android game is make the screen is always on by default, but some games is not. But now there is an Xposed module application to solve that, and it is Stay Awake.

    stay awake android application xposed user interface

    After we activate the Stay Awake module and activate the setting in it's application user interface, then you can press the combination "volume up" + "volume down" keys when playing your favorite Android game or using your applications on your Android device to enable or disable the screen timeout.

    Read more info about StayAwake Xposed module application.
  5. GravityBox (by "C3C076")


    GravityBox is an Xposed module to tweak your Android device display and UI (User Interface). It can do many things like modify the status bar, navigation, tweak the power button, notification panel and bunchs of other user interface tweak.

    gravitybox apk xposed module all android version

    Personally, I like about this Xposed module especially the feature to add a network traffic notification on the status bar on my Android smartphone so I can know the current speed of my internet.

    Read more info about GravityBox application Xposed module.


That's it all of them. It's all just Xposed modules application which I use often on my Android smartphone daily usage. You can find other hundreds of free Xposed modules on repo.xposed.info, and SOME of them is available on Play Store. Consider DONATIONS too to the developer if you found the module / application is usefull.

Xposed Framework Installer APK Fix Android 4.4.4 by Solarwarez

Xposed is such a one of great invention on Android. We can do many things like hacking, theme modding, remapping our Android device key, and many more. And what i most like from Xposed (and the modules of course) is it's not make high risk when we use the modules, because all process we made by the modules can be easily reverted back to the original by just deactivate the module.

But just back few days I changed my Samsung Galaxy V device ROM to Cyanogenmod 11, and the developer give a note that Xposed does not work in this ROM. This is not bug, but it's because Cyanogenmod 11 use Android 4.4.4 that have more updated Android security patch so it's harder to "breach" the system where Xposed will be installed. But one of XDA member Solarwarez@xda made some change in Xposed personally so it can be installed on Android Kitkat 4.4.4. I have tried his Xposed on my Samsung Galaxy V CM11 ROM and it work good.

xposed framework installer fix android 4.4.4 by solarwarez

Xposed Installer fix Android 4.4.4 by solarwarez android application download link


Download via mirror link
-> XPOSED INSTALLER FIX ANDROID 4.4.4 BY SOLARWAREZ.apk

Download original link
-> Download Xposed installer fix android 4.4.4 by solarwarez via XDA Forum

More info about Xposed on Android.

MonsterUI APK - Materialization Theming App For Your Android Device [Xposed]

One more amazing Xposed module Android application called "MonsterUI" APK. On my opinion, MonsterUI is simply the best and simply the most simple application that allow us to theming our Android device to material looking style. And most of great, MonsterUI is an Xposed module which means the modification of our Android device colors, style, window transition, and others changes is made without touching the system itself (by make use of the Xposed framework) so it is moderately safe in its jobs.

Requirements:
Xposed installed.
Backup, just in case.

It looks the concept of MonsterUI for now is to bring the Android Lollipop material style to its user. By installing and using MonsterUI, we can get Android Lollipop style and framework icons, window and app transition, animation on our Android device and we can change the colors, details, etc as we like easily just like using the color picker.

We also can theming our Android device installed applications using per individual settings. Example if you want to change an application main color theme, or bored with the default color of Google Play Store theme, then MonsterUI is the right Xposed module application that can make happen all of that wish :D .

Unfortunately, it looks this Android application is still not 100% complete to cover compatibilities on many Android devices, especially the vendor ROM's like Touchwiz. Maybe MonsterUI will be more compatible with AOSP based ROM or its sister project like CyanogenMod. When I try MonsterUI on my Samsung Galaxy V Touchwiz (stock ROM), i encounter some bugs, crash here, crash there, and unfunctionality.

Hope it will get fixed and of course to get polished with more features, as I seen this Xposed module has gotten many feedback on Play Store.

monsterui android application xposed user interface

Some screenshot on my stock Samsung Galaxy V SM-G313HZ after installing MonsterUI:

samsung galaxy v sm-g313hz settings user interface after monsterui theming

samsung galaxy v sm-g313hz recent apps user interface after monsterui theming

Quoted from the Developer:

MonsterUI is an xposed module which helps you theme your android to looke like android Lollipop.
There is a many customization options like ripple effect, theme accent settings (Primary and Secondary color), Per App Theming and many many more!

MonsterUI APK Android application download link


# MONSTER UI v. 6.1.apk (3.6 MB)


MonsterUI Android application [Xposed module] is available for free on Play Store.

Fix External SD Card on Android 6.0 Marshmallow to Become Full Writable Without Format It as Internal

Android 6.0 Marshmallow is already released and now even already released Android N (Nougat). But there is one major change in the storage access starting from Android 6.0.

The external storage card (SD Card) is not fully writable just like the previous Android version and it also loss of ability to move application and game to the external SD Card but with one condition, we must format the external SD Card and then it will become the part of the device internal storage.

Formatting external SD Card as internal also means that the formatted external SD Card will only work and usable ONLY on that device.

Oh and one more thing, the external SD Card naming is also changes different from previous Android version from /storage/extSdCard/ to /storage/XXXX-XXXX/, where XXXX-XXXX is some combination of numbers and letters.

format as internal external sdcard on android marshmallow

Actually the full write access on external SD Card on Android 6.0 and up is still exist, only to application which got permission to do it. In order to get permission to write on external SD Card, the application must open the "Document storage" and then select the root of external SD Card.

But for the application that not implemented the method (or the app developer is just too lazy to implement it, hehe :D ), the write access to external SD Card is dead (except on directory /storage/XXXX-XXXX/Android/data/domain.application.package.name/.

But for you who don't wan't to format the external SD Card as internal on your Android device, but still want full write and read access, there is one solution using Xposed module called "XinternalSD".

XinternalSD has been tested on my Android smartphone running Android 6.0 Marshmallow, CyanogenMod 13 (CM13) ROM and it could solve the following issues on the following applications i have tested:
  • UC Browser, now i can set the download directory to /storage/XXXX-XXXX/ANYWHEREIWANT/.
  • Helium, now the delete and make backup to external SD Card (/storage/XXXX-XXXX/carbon/) is working properly.
  • Titanium Backup, now i can set the backup folder to /storage/XXXX-XXXX/ANYWHEREIWANT/.
  • And other applications...

Requirements:

xinternalsd main user interface

titanium backup save on external sdcard

Steps how to make external SD Card become full writable on Android 6.0 Marshmallow without need to format it, using XinternalSd


Note that this only make the external SD Card full writable so every application could write and read freely to external SD Card without need permission, and not retrieve the ability to move application or game to external SD Card.

  1. Download and install latest version of XinternalSD.
  2. Activate the XinternalSD module on Xposed.
  3. Open the XinternalSD app, make sure the option "Custom path to internal SD card" and "Full access to external SD card" is √ checked.
  4. Now reboot your Android device and test it yourself...

Keep Your Android Device Screen On when Playing Games using Stay Awake Application APK [Xposed]

Do you love to play games on your Android device, and you hate you must keep pressing the button or swiping screen just to make the screen is not turned off? Yeah, it is so annoying, moreover if when we swipe the screen to make the screen is not sleep then we accidentally tap or swipe a part where we access menu in the game or application that ruining our process on that game / application. But now, I have a solution for you, it is using Xposed module application called "Stay Awake".

Stay Awake APK Android application is an Xposed module created by "92lleo" which can make the screen timeout on our Android device is disabled anytime we activate it. It is very usefull when we play our favorite Android game or using the intensive application to make the screen keep on, so we don't need to press buttons or swiping keys just to make the screen is not turned off which can avoid accidental action.

Quoted from the developer:

This module lets you keep the screen on for any app you want. just press volUp + volDown at the same time to toggle keep ScreenOn. The app in foreground will stay awake until you press the power button or toggle again. In the next version you will be able to set different keys for the toggle action.

Requirements:
- Xposed Framework Installed.

stay awake android application xposed user interface

How to use Stay Awake Android application Xposed module


When we are playing the Android game or using an application, simply press the combination of key " volume up" + "volume down" to switch the screen time out enable / disable.

If the game is not affect / supported (the screen is still going off) after you enable it, you may have to enable the option "always on... (system wide)" in the Stay Awake menu. It will make the screen always on on overy game / application you are using. To turn the screen off, simply by lock the screen using power button on your Android device.

Stay Awake APK Android application (Xposed module) download link


-> STAY AWAKE.apk (+- 1.2 MB)


This module is created by "92lleo" and available for free at repo.xposed.info. Consider DONATIONS to the developer if you found it usefull.

Moving Application & Game Data and OBB Files to External Memory Card with XinternalSD APK [Xposed]

Want to move application data to external memory? Or do you want to play HD games on your Android device with Gigas size but only have small phone storage? Then the solution is using Xposed module called "Xinternalsd". Xinternalsd has been tested by me on Samsung Galaxy V (Android Kitkat 4.4.2) which only have +- 2GB internal memory space :'v . But how if I want to install game Modern Combat 3 (1.5GB) and FIFA 14 (1.5GB) at the same time? It could happen with Xinternalsd app. XinternalSD is created by one of Xda forum member pyler@XDA.

Xinternalsd will redirect the app access from internal memory (storage/emulated/0/) to external memory card (storage/extSdCard/) by changing the targetted application behaviour. For example if an application think it must write or read in folder storage/emulated/0/myfiles/ (internal memory), in reality XinternalSD had redirect the application "think" to storage/extSdCard/myfiles/ (external memory). By this way, we can move the OBB file of HD game that usually > 1GB to external memory card storage/extSdCard/Android/obb/.

Requirements:
Rooted
Xposed Framework installed


Steps moving (or redirecting) Application & Game data to external memory card (SD Card) using XinternalSD


  1. Install XinternalSD.apk
  2. Open the Xposed Installer app, tap on "Modules" and check XinternalSD to activate it. Reboot your Android smartphone device.
  3. Open XinternalSD, wait for it loading, tap on "enable for apps", and select application or game you want to apply the XinternalSD rule. Done! now applications or games enabled in XinternalSD that try to access internal storage (storage/emulated/0/) will be redirected to external storage (storage/extSdCard/).


My exprience when using it, almost all game work by XinternalSD method like GTA (GTA III, GTA VC, GTA SA), Final Fantasy (III + IV), FIFA (FIFA 14, FIFA 15), and other games i had played except Angry Bird Transformer. And this also work on PPSSPP (redirected to storage/extSdCard/PSP/) and ePSXe (redirected to storage/extSdCard/epsxe/).

Credits:
- Developer of xposed installer dan xinternal sd (More info, please search info at forums.xda-developers.com).
- Syamsul Ramdan Firdaus@Facebook, for the info.

XinternalSD android application version history download link


Update Changelogs:
V 4.0
- Android 6.0 support, hopefully :) .

V 4.7
- Update some code's
- Update German translation

V 4.8
- Update translation
- Show package name in application list
- Show option to hide app icon


# XINTERNALSD v. 4.0.apk (22kB) | 24/12/2015

# XINTERNALSD v. 4.7.apk (70kB) | 24/7/2016

# XINTERNALSD v. 4.8.apk (81 kB) | 18/9/2016


This Xposed module is available for free at repo.xposed.info. Consider DONATIONS to the developer if you found it usefull.

Add a Smart Clipboard Feature When Typing on Android Phone using Native Clipboard APK

Clipboard is such a important things for me. Moreover, i am do a lot of "writing" work on my Android smartphone and copy - paste. With clipboard on my phone, i can speed up my works. Different with my stock ROM on Samsung Galaxy V, it have it's own clipboard feature on it. Unfortunately, clipboard does not present as one of features in CyanogenMod ROM nor the AOSP keyboard. But luckily i found one of Xposed module called "Native Clipboard".

Native Clipboard created by DHM47@XDA. It is one of Xposed module that allowing us to add a nice clipboard feature when we typing. We even can customize the appearance such as the sizes, font size, themes / colors, and clipboard sizes. It is supported all android version from Kitkat to Marshmallow.

Here is some quick features on Native Clipboard:
- Some gesture option to call the clipboard.
- Tweak the theme / colors.
- Blacklisting.
- We can edit the copied text.
- Lock important text for you.
- And more ...

Requirements:
* Xposed Framework installed
* Native Clipboard.apk app (download link at the end of post).


Well just install Native Clipboard.apk like normal app. After you install it don't forget to activate it on Xposed.

Actually there is 2 methods to use native clipboard, with Xposed and with Accessibility service. Accessibility service setting take more less ram and doesn't need background service.

On Android Marshmallow below, if we used Xposed methods it will bring more gesture customization to call the clipboard.

Only on Android Marshmallow, a dedicated clipboard button is added beside the "PASTE" button or by clicking the three dots icon that appear when you are "block" some characters.

native clipboard button on android marshmallow

Native Clipboard apk download link


# Native Clipboard v 4.7.2.apk (2.4 MB) | 22/6/2016


This module is created by "DHM47" and available for free at repo.xposed.info, consider DONATIONS to the developer to support them if you found the app useful.

How to Disable APK and Package Manager Signature Verification Using Lucky Patcher

Have you experience when installing an application and fail with message "app not installed" ? Maybe and maybe, it could be not the apk is corrupt, it could be the problem is with the signature verification process.

The problem can come from an apk if an apk is not the originall one, if it has been modified the signature verification will fail you from installing it. Or when you try to install an apk with older version than the installed one, the installation will also maybe fail.

Quoted from XDA developers:

"If you obtain an APK from outside of the Google Play Store and attempt to install it as an update to your currently installed app (read: same package name), the OS will attempt to validate the application’s certificate to make sure that it came from the same initial developers. If the certificate matches, the application install will
proceed as planned, your application will retain its existing data, and all is gravy. If the signature is not valid (indicating that the APK has been tampered) or if the certificate does not match that of the original app, the installation will fail."


Now here is an easy way to "force" the app / apk to be able to installed in our Android device.

Requirements:
- Rooted
- Lucky Patcher.apk app.


Step to solve "application not installed" caused by signature verification problem


FIRST OPTION (if you already install Xposed)

This first way is more safe / reduce the brick chance of our Android device system, but it is required the Xposed installed. You must already Install the Xposed Framework, then activate the "Lucky Patcher +" module in xposed.

  1. Open Lucky Patcher.
  2. Tap on "Toolbox" -> "Xposed settings".
  3. Check the "Disable .apk signature verification" and "Disable signature verification in the package manager".
  4. Apply changes, done.

SECOND OPTION (do some patch to our Android device system)

  1. Open Lucky Pather.
  2. Tap on "Toolbox" -> "Patch to android".
  3. Check the "Disable .apk signature verification", then apply changes. After this maybe your smartphone will reboot automatically, if not continue to next step.
  4. Still in the Patch to Android, then check the "Disable signature verification in the package manager", Apply changes, done (May reboot automatically).


If after doing this the application or game still gave same result: "App not installed", then the problem maybe not caused by the apk signature, maybe the apk is corrupt either not supported in your Android smartphone device.