Showing posts sorted by relevance for query Custom rom. Sort by date Show all posts

What is Stock - Custom - ROM on Android

ROM stands for Read Only Memory. ROM is basically part of device storage where the content is cannot easily to be changed, that's why it's called "Read Only". It need some hacking jobs to change a ROM of Android device. And it is because changing ROM is a hacking jobs, it is also be "illegal" in some way to change the ROM of Android device to the device manufacturer. But it's not illegal like you will be jailed, cause me myself have done it many times (lol :D ), it is just like the device manufacturer will say "Hey i build that phone, you have no permission to modify it" and something "Owh, you modify the system of my phone. Allright, just don't blame me if something happen to your device" :D .

Change the ROM in Android device refers to change or modify the system like the display, system contents, or even upgrade / downgrade the Operating System versions. Only with change the ROM by installing custom ROM is the only way i can feel and use Android 6.0 Marshmallow on my Samsung Galaxy V which originally released as Android 4.4 Kitkat.

custom roms on android

Stock ROM on Android


Like it's called "Stock" ROM is the original ROM released with the device from the manufacturer. Example the stock ROM Android device on Samsung is Touchwiz, on Xiaomi is MIUI, on Sony is Sense, etc.

I basically do not like stock ROM especially on my Samsung Galaxy V cause there is so much unnecessary bloatware and it just overload the system and eat storage space and RAM. Example on my Samsung Galaxy V stock ROM, there is Google Plus app (who need Google Plus if there is something called Facebook, oops... :D ) and Line app which i think it's just "brotherhood app" (because both Line and Samsung was born at South Korea :D ).

Advantages of using stock ROM:
  • More stable
  • Easy to use
  • Get support service from device manufacturer

Custom ROM on Android


Custom ROM is a ROM created by third party. Let's just say it is developed outside the legal device manufacturer. Example the most popular custom ROM on Android is CyanogenMod, AOKP, etc. One thing you must remember for custom ROM development on Android, it maybe started by one man, but it involved huge number of people contribute to the development. That's why i think Android community is so cool :D .

Because Android itself is an Open Source project, so everyone can modify, tweak, and release his own creation of Android freely to the public. And for the reason, Android now become the most popular mobile Operating System in the world and beat the other predecessors like Symbian, Blackberry, and even iOS.

The advantages of custom ROM of course it will be more suitable to the user needs. Because custom ROM is developed by a group of people, where they get suggestions and requests directly from the Android users of how and like what the ROM should be developed.

Advantages of using custom ROM:
  • Display and UI is more attractive
  • The features is more suitable to the user
  • Many choices from different developers
  • Performance increasement
  • Can upgrade the Android version


Although it's more interesting to change your Android device ROM into a custom ROM, remember that installing a custom ROM will make your warranty of your device void. Installing and using a custom ROM is also need some knowledge to do it. Read, learn, and gather informations before you decide to install a custom ROM on your Android device because if you make a mistake, your device could be not booting anymore or even it will become totally dead.

RevoOs v 2 - Custom ROM Samsung Galaxy V SM-G313HZ

Allright this time i will share a Custom ROM for Samsung galaxy V called RevoOS v. 2. This Custom ROM is my 4th ever custom ROM installment on my device and maybe this ROM will be good for you who like listen to music on your device (maybe hehe...)

Requirements:
1. Custom Recovery CWM / TWRP installed
2. BACKUP as needed
3. Brain :v


Title RevoOS v. 2 ROM
Author Hyekal HiTech
Source / thread GalaxyVarchive Blog
Features * Rooted
* Deodexed
* Zipalign system apk's
* Bloatware Removed
* Rebooter
* 13 Battery Selectable Icon
* Battery Bar
* Custom Carrier Label
* Potato Clock
* Contextual Header
* Gradient Header
* Dinamic Statusbar (Tinted all apps without third party application)
* 3 Tab SystemUi
* Recent Card Stack Wannabe
* Music Player on Statusbar
* Network Traffic Meter (CharmeleonOS)
* Network Speed Meter (Thinking Bridge)
* Carbon Network Traffic
* Visualizer
* AOKP Weather on Lockscreen
* ListView Animation
* Low Battery Warning
* MiPop
* Multiwindow Sidebar
* App list di status bar
* Build prop editor di pengaturan
* Dan Lain-Lain...
Size +- 320 Mb
Download link 1. ROM:
- RevoOS ROM v. 2.zip

2. Additional files:
- Dolby Fix.zip
- DSP Fix.zip
- Revo Tweak.zip

Installation RevoOs v2 ROM (example with CWM)


!!! Highly recommended to install from FRESH stock ROM !!!

1. Download file ROM RevoOS v. 2 and it's additional file, save it to your external memory.

2. Put device into recovery mode, then do a "wipe cache", then go to -> "Advance" -> "Wipe dalvik cache". After done go back.

3. We start the installation process of ROM RevoOS v. 2 on our Samsung Galaxy V device. Choose "Install zip" -> "choose zip from sdcard", Find and choose the zip file of ROM Revo OS v. 2 to install it.

4. After the ROM done installed, choose again "choose zip from sdcard", and install the additional zip files one by one. After all files have installed go to "advanced" -> "wipe dalvik cache". Reboot your device and wait patiently for the apps optimizing.


After i use this Custom ROM RevoOS v. 2 for Samsung Galaxy V, it looks there still some bugs like missing text on some little part, icons that too close each other without margin at status bar, and bugs on the music player in SystemUi that sometimes laggy.

Zentouch Final - Custom ROM Samsung Galaxy V SM-G313HZ

Finally after 6 months i have Android smartphone Samsung Galaxy V SM-G313HZ, I brace myself to install a custom ROM by myself :v. Because before i hesitate to do it 'cause i don't have my own PC, what if something happen and there is no Computer / PC at that moment? But because i very want to change the display / theme and maybe it will get some performance increase, with some prepared backup and a little read from many guides, Alhamdulillah it was success with smooth hehehe :).

Moreover Samsung Galaxy V SM-G313HZ is classified to low end smartphone device, so the Custom ROM for it is not many. Allright check it out my ever first custom ROM installation, Zentouch. Maybe this custom ROM name come from ZENfone and TOUCHwiz, Samsung ROM (Touchwiz) with some Zenfone taste (maybe something like that :-/ ).

After i change to this ROM, i feel my device is a little smoother either with gaming (maybe because the bloatware is removed and the system app is zipaligned). Even this ROM had come to the final version, it is unfortunately there still some bugs when i try it.

Requirements:
- Custom recovery installed
- Backup as needed
- Brain


Title Zentouch ROM Final
Author Hyekal Hitech
Size +- 281 Mb
Features * Rooted
* Deodexed
* Zipalign system App
* Bloatware removed
* Disable signature apps
* Asus Calculator
* Asus Deskclock
* Asus Recorder
* Asus Gallery
* Asus Launcher
* Asus Browser
* Asus Music Player
* Asus File Manager
* Asus Calendar
* Asus Do it later
* Redesign Desain System Icon ke Asus Icon
* Asus Theme Settings (LookALike)
* Statusbar Contextual Header
* And many more...
Source / thread Galaxyvarchive Blog
Download link Zentouch Final Custom ROM.zip

Installation:

!!! Highly recommended to install it from fresh stock ROM !!!

Example using custom recovery CWM:
- Reboot to recovery mode.
- Do "Wipe cache partition".
- Go to "Advance" -> "Wipe dalvik cache", after done go back.
- Choose "Install Zip" -> "choose zip from sdcard", find where you put the archive file of Zentouch ROM and choose it -> "Yes" -> Wait untill installation process done -> " Go back".
- Choose "Advance" -> "Wipe dalvik cache"
- Reboot smartphone, wait patiently for the apps optimizing.

Few bugs you MAYBE experience:

Q: Google Play Service and com.process.googlegaps always "stopped"?
A: Delete the Google Play Service system app (you can freeze it first to make it easier). Download the newest version of Google Play Service App from another website and install it manually.

Q: ASUS File Manager force close when try to extract something?
A: That file manager is ported from Zenfone 5, it is "ported", so it will not be 100% perfect like the original

Q: Asus Launcher force close?
A: Pull down the status bar and go to "Settings" by tap the setting shortcut icon, in Settings go to "Application Manager", slide to the left untill you are in "All Applications", find Asus launcher app, do a "delete data" and "delete memory" / cache.

Q: White text on white background on some little part of Settings?
A: Not a big problem :)

Note: I'm here just as a user, so if you have advance question or advance want-to-know, please visit the source link.

CyanogenMod 12.1 Unofficial [BETA-3] - Custom ROM Samsung Galaxy V SM-G313HZ / SM-G313H / SM-G313ML

Long time no post ... Now i back with a happy news for your All Samsung Galaxy V SM-G313HZ Android users, which is another popular firmware or custom ROM that is Cyanogenmod 12.1. With this ROM (or firmware), our beloved vivalto3gvn device will be able upgrade the Android OS version to LOLLIPOP LOLLIPOP, LOLLI LOLLI LOLLI LOLLIPOP LOLLIPOP, LOLLI LOLLI LOLLIPOP :v .

Actually the ROM is already developed months back ago, started by the same developer of CM11 for Galaxy V doesntexits@XDA. But because this only personal blog (not a devs blog), i'm just waiting the stable enough version for all people to use it, and in fact this developer also ngoquang2708@XDA says the developing of this CM12.1 for Samsung Galaxy V SM-G313HZ will be stopped due to his focus developing Cyanogenmod 13 for Galaxy V (it's the hottest android Marshmallow AMAZING :v ).

Few days i try this CM12.1 ROM on my Samsung Galaxy V SM-G313HZ, i am very satisfied with it. It's already stable i think, the fastest ROM i have ever used and there is no word except Amazing!!! Great work from the developers. Yeah because the developed is stopped at BETA-3 state, so there will be little bug maybe (but it's just minor and not very important i think).

Requirements
* Already installed custom recovery TWRP
* BACKUP
* Brain :v

cyanogenmod 12.1 unofficial custom rom samsung galaxy v sm-g313hz homescreen screenshot

cyanogenmod 12.1 unofficial custom rom samsung galaxy v sm-g313hz ram running apps screenshot

cyanogenmod 12.1 unofficial custom rom samsung galaxy v sm-g313hz notification drawer screenshot

cyanogenmod 12.1 unofficial custom rom samsung galaxy v sm-g313hz overview screenshot

ROM title Cyanogenmod 12.1
author doesntexits@XDA, ngoquang2708@XDA
source / thread XDA Forum
ROM OS version Android 5.1.1 Lollipop
target device SM-G313HZ, SM-G313H, SM-G313ML
download link -> ROM
- BETA-3 Update 1.zip (253 MB) - 28/5/2016
Download: [VIA XDA]

-> Google Apps
Download: PICO GAPPS.zip (62.3 MB)

How to install Cyanogenmod 12.1 ROM on Samsung Galaxy V SM-G313HZ


  1. Power off your Android smartphone, and go into recovery mode
  2. Do a full wipe. Go to "Wipe" -> "Advance wipe". Wipe (tick) the "system", "dalvik / art", "cache", "data", and "internal storage", swipe to confirm wipe.
  3. Installing the ROM. Go to "Install", find where you save the CM12.1 ROM, Install the zip file of CM12.1 and wait untill done
  4. After the ROM is finish installed, optionally (recommended) install Google Apps. Pico GAPPS is recommended as it is very simple so it's suitable for our little Samsung Galaxy V device. You can find it at http://opengapps.org, or IF AND ONLY IF are you confuse you can download it from the link i gave at the download link section above. After it is already installed, "wipe dalvik cache"
  5. Finally, reboot your Android smartphone. Caution! Because Android Lollipop is using different runtime which is ART and our device is only have singlecore processor, so the "optimizing apps" process will take very-very loooooooong time (maybe it take about 20 minutes or more).

Known Bugs
* [SM-G313ML] mobile data not work. But i heard it already solved by the guys, so check the original thread.
* Switching other fonts directly will get bootloop. But i try change the font with app called "iFont" and use it on "root mode", and it works great no problem.
* Distorted sound on calls when using bluetooth headset.

Nemoid v 1 - Custom ROM Samsung Galaxy V SM-G313HZ

Nemoid is a stands for NEed MOre IDea (that's the source says :v This custom ROM Nemoid ini is my 3rd custom ROM that I ever tried on my device, and maybe this is the first ever custom ROM created for Samsung Galaxy V.

Requirements:
- Custom recovery installed CWM / TWRP
- Backup as needed
- Brain :v (user factor)


ROM Title Nemoid ROM v. 1
Features * Rooted
* Deodexed
* Disabled signature apps
* Android lollipop Theme (Wanna Be)
* AOKP weather on lockscreen
* Custom drawer (left and right)
* Contextual statusbar header
* Circle RAM
* Screenshot button on custom drawer
* Profile UI on custom drawer
* Remodified lockscreen layout
* AOKP performance Control
* Ram progress bar
* Notification background settings
* Custom clock style
* Battery bar
* 13 battery style
* Network speed meter (Thinking bridge and ChaOS)
* Network traffic (Carbon rom style)
* App circle sidebar
* Mi-POP
* Lollipop platlogo
* Multiwindow sidebar
* Omni switch
* Custom boot animation
* Google camera, gallery and deskclock
* Bloatware removed
* Fix external storage
* Heads up notification
* And many more...
Source / thread GalaxyVarchive Blog
Size +- 287 Mb
Download link Nemoid ROM v. 1.zip

Installation (example via CWM):

- Highly recommended installed from fresh stock ROM and wipe data first.

1. Download the ROM zip file and save it to your external memory card

2. Put your Samsung Galaxy V device into recovery mode.

3. Do a "wipe cache partition" and "wipe dalvik cache" (advance -> wipe dalvik cache) first. After done go back.

4. Choose "Install zip" -> "choose zip from sdcard", find and choose where you put the Nemoid v 1 ROM zip file -> "Yes", wait untill the ROM installation process done. After done, do a "wipe dalvik cache".

5. Reboot your Samsung Galaxy V device and wait patiently for the apps optimizing.


Well for me, there is a few bugs:

- SystemUi that "stop" (appears unlimited popup) when tried to change the photo profile in notification bar. So don't change the photo profile, except you know how to fix those situation.

- White text on white background in some little part of "Setting".

- Google Play Service (com.process.googlegaps) stops. To fix it, delete the Google Play Service app and then install manually the newest version of Google Play Service (you can find it at apk4fun.com if you don't know).

Palents v 1 - Custom ROM Samsung Galaxy V SM-G313HZ

Palents is another custom ROM that showing the theme of Android Lollipop for Samsung Galaxy V. This ROM is developed by one of Galaxy V Facebook group member, Nasrulloh. For me, this ROM is pretty light and quite stable.

Requirements:
1. Custom recovery installed
2. Rooted
3. BACKUP as needed
4. Brain :v


Rom title Palents v. 1
Author Nasrulloh
Source / thread GalaxyVarchive
Features - Rooted
- Deodexed
- Lollipop Theme
- Card stack style recent apps
- +-200 Installed fonts
- Rom Control
- Many more...
Size +- 254 Mb
Download link Palents Custom ROM v. 1.zip

Installation Palents v 1 ROM Samsung Galaxy V SM-G313HZ (example with CWM)


!!! Highly recommended to install it from fresh stock ROM !!!

1. Download the zip file of ROM Palents v. 1 and save it to your external memory card.
2. Put device into recovery mode.

3. Do a "Wipe cache partition", and then go to "Advance" -> "Wipe dalvik cache".

4. And now we begin the installation process of ROM Palents v. 1 on our Samsung Galaxy V. Choose "Install zip" -> "choose zip from sdcard", find and choose the zip file of Palents v 1 ROM to install it. Wait for the ROM installing

5. After done, go back and go to "Advanced" -> "wipe dalvik cache", and reboot your sevice. Wait patiently for the apps optimizing.

How to remove the sidebar

1. Install application Link2SD.apk.

2. Open the link2sd app and then find apps: Multiwindow sidebar and Mipop, delete it (if you not found Mipop app just ignore it).

3. Reboot / restart Android smartphone.


Bug that i knew in this ROM is just white text on white background on some little part of setting.

CyanogenMod 13 Unofficial - Custom ROM Samsung Galaxy V SM-G313HZ / SM-G313H / SM-G313ML

Now let's move our beloved Samsung Galaxy V SM-G3131HZ to the grand final, that is Android 6.0 Marshmallow :v . Out there, there are even more Android smartphone with better specs that have not "tasted" yet the CyanogenMod 13 / Android 6.0 Marshmallow, but it already available for this little device. For a moment, this phone feel like a luckiest phone in the world :D .

CyanogenMod is a custom ROM's (firmware) project based on Android Open Source Project ROM's, with extra contribution from the Android community. It is designed to increase performance and more prioritize to functionality and reliability.

This CyanogenMod 13 / CM13 ROM for Samsung Galaxy V vivalto3gvn (SM-G313HZ / SM-G313H / SM-G313ML) still developed by the same developer who bring CM11 and CM12.1, doesntexist@XDA and ngoquang2708@XDA, so give thanks and big applause to them.

Requirements:
* Already installed custom recovery TWRP
* BACKUP
* Brain :v

Update Changelogs:
Stable 1
* Fixed GPS (except Device Only mode)
* Fixed mobile data switching

cyanogenmod 13 homescreen custom rom samsung galaxy v sm-g313hz

cyanogenmod 13 ram screenshot custom rom samsung galaxy v sm-g313hz

cyanogenmod 13 overall screenshot custom rom samsung galaxy v sm-g313hz

ROM title CyanogenMod 13
contributors doesntexits@XDA, ngoquang2708@XDA
source / thread XDA Forum
ROM OS version Android 6.0.1 Marshmallow
target device SM-G313HZ, SM-G313H, SM-G313ML
download link -> ROM [Stable 1].zip (323 MB)
download: VIA XDA | VIA MEDIAFIRE

-> PICO GAPPS 24/10/16.zip (115 MB)

Steps how to install CyanogenMod 13 ROM for Samsung Galaxy V SM-G313HZ


  1. Power off your Android smartphone, and go into recovery mode
  2. Do a full wipe. Go to "Wipe" -> "Advance wipe". Wipe (tick) the "system", "dalvik / art", "cache", "data", and "internal storage", swipe to confirm wipe.
  3. Installing the ROM. Go to "Install", find where you save the CM13 ROM, install the zip file of CM13 / CyanogenMod 13 ROM and wait untill done.
  4. After the ROM is finish installed, optionally install Google Apps. Pico GAPPS is recommended as it is very simple so it's suitable for our little Samsung Galaxy V device. You can find it at http://opengapps.org, or IF AND ONLY IF you are confuse you can download it from the link i gave at the download link section above. After all are already installed, do "wipe dalvik cache".
  5. Finally, reboot your Android smartphone. Caution! This first boot process may will take very-very loooooooong time (maybe it take about 20 minutes or more).

Known bugs:
- FM radio is unusable.
- Distorting sound on Calls when using bluetooth headset.

Nemoid v 1.1, 1.2, 1.3 Update - Custom ROM Samsung Galaxy V SM-G313HZ

Nemoid ROM is a Custom ROM for Samsung Galaxy V device. At least what i have know, this ROM has come to the version 1.3, so I hope there will be the next version. The zip file i share in this post is not the ROM itself, but it's just the update file. So we must install the Nemoid ROM first, you can check it from previous post in this blog.


Requirements:
- Custom recovery installed
- Brain

Nemoid ROM v. 1.1


-> Update changelog:
* With AROMA Installer
* Fix Google Play Service
* Fix Google Maps
* Fix background volume control
* Fix shortcut camera on lockscreen* Add CRT screen off animation (vertical and horizontal)
* Add volume (up & down), menu and power botton to navigation bar
* Other improvement and fix bugs

-> Download link: Nemoid ROM v. 1.1.zip (+- 43 Mb)

Nemoid ROM v. 1.2


-> Update Changelog:
==> FIX
* FC when click button edit photo/picture
* FC statusbar when open recent apps in landscape mode
* FC panorama mode (camera)
==> Changes
* Google camera with CyanogenMod 11 Camera
* Remodified recent apps style
* Add nemoid info to about phone
* Bring back "No Notifications" text
* Little modification on expanded bar to make it more lollipop looklike
==> New features
* Low battery warning
* Gestures anywhere
* Custom progress bar
==> Other improvement and fix minor bugs...

-> Download link: Nemoid ROM v. 1.2.zip (+- 35 Mb)

Nemoid ROM v. 1.3


-> Update changelog:
==> Changes
* Bring back close drag handle bar function
* Remodified recent app style to be card stacked view (wanna be)
==> New features
* Autostarts settings (port from settings.apk nexus5)
* Double tap battery to screen off
==> Other improvement and fix minor bugs...

-> Download link: Nemoid ROM v. 1.3.zip (+- 14.5 Mb)

Source / thread: GalaxyVarchive

Installation Nemoid ROM update files (example via CWM)


1. Download the update ROM file(s) and save it to external memory card.

2. Put your Samsung Galaxy V device into recovery mode. Do a "Wipe cache", after done go to "Advance" -> "Wipe dalvik cache".

3. Choose "Install zip" -> "choose zip from sdcard", find and choose the update zip file to install it one by one.

4. After done, do a "Wipe dalvik cache". Reboot your device and wait patiently for the apps optimizing.


Although i have update the Nemoid ROM for my Samsung Galaxy V to the version 1.3, it's look like some bugs still not dissapear yet like problem on Google Play Service (must reinstall), and "stop" on systemui when try to change the photo profile in notification bar.

CyanogenMod 11 Unofficial - Custom ROM Samsung Galaxy V SM-G313HZ / SM-G313ML / SM-G313H

"The time has finally come"... The long awaited ROM (or firmware) finally come to stable to a 512 MB RAM, 1.2GHz Singlecore processor Samsung Galaxy V, that is Cyanogenmod :v.

This CyanogenMod 11 is an UNOFFICIAL, so don't expect to be perfect 100% and can update this ROM via OTA (On The Air).

But as long as i use this CyanogenMod ROM 11 in my Samsung Galaxy V, everything goings good... This ROM is the fastest, lightest, no explode and no nuclear leaks :v .

CyanogenMod is a firmware based on stock Android firmware that built to increase performance and designed prioritize to functionality. CyanogenMod was born from community, by community, and for community (it's like democracy :v ). Operation system that used on this CyanogenMod 11 is Android 4.4.4 kitkat.

Requirements
- Custom recovery installed (TWRP preferred)
- BACKUP as needed
- Brain :v


Update changelogs:
- 09/5/2016 [3rd final release]
* Fix everythings in older release like battery stats and default zram preset.
* Update Android security patch source.

ROM title Cyanogenmod 11 - UNOFFICIAL
author doesntexits@XDA
target device SM-G313HZ / SM-G313H / SM-G313ML
source / thread XDA Forum
download link -> ROM
ROM [1st Final Release] (+- 240 MB)
ROM [2nd Final Release] (+- 241 MB)
ROM [3rd Final Release] (+- 217 MB)

-> Google Apps
download: GAPPS pico.zip (96.5 MB)

Installation firmware CyanogenMod 11 - Unofficial Samsung Galaxy V SM-G313HZ (example via TWRP)


  1. Put device into recovery mode, choose "Wipe" -> "Advance wipe", and then check or wipe the following:
    √ Dalvik cache
    √ Data
    √ Cache
    √ System
    √ Internal storage
    Swipe to confirm wipe. After done, go back.
  2. Install zip files. Choose "Install", find where you save the ROM zip file and choose it to install it.
  3. (Optional) After the ROM is finish installed, you can straight install the Google Apps. Download it at http://opengapps.org or IF AND ONLY IF you are confuse, you can download from the link I gave above.
  4. Done, "Wipe dalvik cache" and reboot your smartphone and wait patiently for the apps optimizing.

If you choose to install the 2nd Final Release version and the ROM cannot boot up your phone, then the solution is to install a custom kernel. Read more on this Getux Kernel post.


Some bugs:
- [SM-G313ML] Mobile data not working.
- (1st Final Release), Sometimes the gallery app become blackout. Close gallery app, and clear it from "recent apps" can solve it.
- (3rd Rinal Release and 2nd Final Release), Reported by some guys having a random reboot sometimes when using mobile data.

Note:

* To activate the SIMcards or data internet, go to "Setting" -> "SIM cards" -> "Configure SIM cards".

What is ODEX, deODEX, and The Benefits on Android

For us who like to modding our Android device must be often hear about "ODEX" and "deODEXed". So what is that things? And why there must be two DEX type? Actually this is myself question :v .

Quoted from stackoverflow.com:

Applications are basically glorified ZIP archives. The java code is stored in a file called classes.dex and this file is parsed by the Dalvik JVM and a cache of the processed classes.dex file is stored in the phone's Dalvik cache.

An odex is basically a pre-processed version of an application's classes.dex that is execution-ready for Dalvik. When an application is odexed, the classes.dex is removed from the APK archive and it does not write anything to the Dalvik cache. An application that is not odexed ends up with 2 copies of the classes.dex file - the packaged one in the APK, and the processed one in the Dalvik cache. It also takes a little longer to launch the first time since Dalvik has to extract and process the classes.dex file.

If you are building or choosing a custom ROM, it's a really good idea to odex both your framework JAR files and the stock apps in order to maximize the internal storage space for user-installed apps. If you want to theming it, then simply deodex -> apply your theme -> reodex -> release.


DEX stands for "Dalvik EXecutable", so ODEX will be " Optimized Dalvik EXecutable". As it says, ODEX is an optimized one from the app apk dex file so the system will more easier and faster to read and execute the application information.

The way to know which one our ROM classified to is pretty simple, just use an application that can explore the root directory (like ES File Explorer or Root explorer), and go to directory /system/app. If we found inside the directory two same application name with different extension (example: gmail.apk and gmail.odex) so our Android ROM is on ODEX. If not found any odex file inside the directory, then our ROM must be deODEXed.


ODEX on Android


ODEX ROM oftenly we will find it on stock ROM, the default ROM that created by device manufacturer. ODEX ROM will save more phone storage (internal memory) because the system apk app DEX (ODEX) files will moved to /system

ODEX ROM has advantages:
- More safe and stable, because not easy to be changed / modified
- More free space on internal memory

deODEXed on Android


Different with another one, deODEXed ROM will oftenly be found on stock ROM (3rd party created ROM). Say for ROMs for my Samsung Galaxy V, the developers of the custom ROMs make its all deODEXed (except CM11). It will use more space on internal memory, but saves more on system storage.

deODEXed ROM has advantages:
- Easier to mod / theming it (it's good for you who like to change the theme like icon, systemUI, colors, etc)
- More free space on /system directory.


How about speed and RAM problem

From what i read, many says that ODEX ROM is faster than deODEXed, moreover from booting time. But from what i feel in my Samsung Galaxy V Android, the two is just the same. It is true need a longer booting time in a deODEXed ROM, but it just happen one time when the ROM is first booting (just after i install the deODEXed custom ROM)

If see from RAM problem, yes i feel the ODEX ROM has more empty RAM space. But the different is not very great, maybe the RAM is just 10% more empty from deODEXed one. Because the RAM or speed is basically up to the user how he treat his Android device and the size of application that installed on the device.

HiTech v 2 - Custom ROM Samsung Galaxy V SM-G313HZ

HiTech ROM v. 2 is a custom ROM for device Samsung Galaxy V SM-G313HZ, inspired from one of most popular ROM in the world Cyanogenmod 11.

Requirements:
- Rooted
- Custom recovery installed
- Brain


Title HiTech ROM v. 2
Author Hyekal HiTech
Features * Rooted
* Deodexed
* Init.d support
* Support swap
* Cyanogenmod 12 Boot Animation
* Cyanogenmod 11 Apps
* Gapps integrated
* Dinamic statusbar
* Power Toggle
* Weather on lockscreen
* Theme Settings to look like CM11 (Wannabe)
* Card Stack Recent
* Clock Options
* MiPop
* Multiwindow Sidebar
* Network Traffic Meter (Thinking Bridge&CharmeleonOS)
* Rebooter
* Listview Animation
* Font Chooser
* Low Battery Warning Options
* Dsp Manager
* Build.prop mods
* System application like stock Android
* And many more.....
Source / thread GalaxyVarchive Blog
Size +- 276 Mb
Download link - HiTech ROM v. 2.zip
- HiTech Tweaks.zip

Installation HiTech ROM v. 2 Samsung Galaxy V SM-G313HZ (example for CWM)


!!! Highly recommended installed from STOCK ROM !!!

1. Put device into recovery mode

2. Go to "Advance", do a "Wipe cache" and "Wipe dalvik cache". Go back.

3. Choose "Install zip" -> "Choose zip from sdcard", locate and choose the HiTech ROM v. 2 zip file. Wait untill the ROM installation process done.

4. Choose Install zip agan, and this time install the zip file of HiTech Tweaks. Go back.

5. Choose "Advance" -> "Wipe dalvik cache", and finally reboot your device and wait patiently for the apps optimizing.

Well, this ROM quite stable, it's just have a problem on the Trebuchet launcher (sometimes force close), and the RAM usage is too big (maybe it's because the increase of zram size to 1GB so the RAM swap process become slower). For the above bugs, we can fix it by ourself it is up to the user. Ya, because this ROM last release titled "v 2" so I hope there will be next version that more stable and of course cooler xp .

CyanogenMod 14.1 [BETA-2] - Custom ROM Samsung Galaxy V SM-G313HZ

Hey hey hey, CyanogenMod 14.1 (CM14.1) ROM is arrived on Samsung Galaxy V SM-G313HZ! As we know, the latest stable Android version now is Android 7.1 Nougat, and this ROM use it.

Again, CyanogenMod 14.1 or CM14.1 Custom ROM for Samsung Galaxy V SM-G313HZ is still developed by the same developer who brought us the previous CyanogenMod ROM series for Samsung Galaxy V (check more on ROM info below). Big applause and unlimited credits to them.

Anyway, As my experience when using it CyanogenMod 14.1 ROM is something that will not give us high performance or fast as lightning or super smooth on our Samsung Galaxy V SM-G313HZ single core phone, with 512 MB RAM. If you want to increase the performance, you have to use your brain like disable the animation, don't install the Gapps, etc.

But this ROM provide our little Android phone the latest Android 7.1 Nougat, so we lucky to get experience the Android 7.1 Nougat Operating System on this single core Android phone. Believe me, there are many Android smartphone with better specs out there that not so lucky like Samsung Galaxy V yet.

Requirements:

CyanogenMod 14.1 homescreen Samsung Galaxy V

CyanogenMod 14.1 overview screenshots Samsung Galaxy V

ROM title CyanogenMod 14.1 / CM14.1
contributors ngoquang2708@XDA
source / thread XDA Forum
ROM OS version Android 7.1 Nougat
target device SM-G313HZ
download link -> ROM [BETA-2] zip (283.3 MB)
download: VIA XDA | VIA MEDIAFIRE

-> PICO GAPPS ARM 7.1 2016/12/17.zip (114.5 MB)

Steps how to install CyanogenMod 14.1 ROM for Samsung Galaxy V SM-G313HZ


  1. Power off your Android smartphone, and go to recovery mode.
  2. Do a full wipe. Go to "Wipe" -> "Advance wipe". Wipe (tick) the "System", "Dalvik / art", "Cache", "Data", and "Internal storage", swipe to confirm wipe.
  3. Installing the ROM. Go to "Install", find where you save the 14.1 ROM zip file, install the zip file of CM14.1 / CyanogenMod 14.1 ROM and wait untill done.
  4. After the ROM is finish installed, optionally install Google Apps. Pico GAPPS is recommended as it is very simple so it is suitable for our little specs Samsung Galaxy V device. You can find it at http://opengapps.org.

    Or IF AND ONLY IF you confuse, you can download it from the link i gave at the download link section above. After all already installed, do "wipe dalvik cache".
  5. Finally, reboot your Android smartphone. Caution! This first boot process time can take longer than amazon river. It will need 30 minutes or more for the first boot, so be patient.

Knowing bugs:
  • CM file manager cannot access external SDcard. Solution: You can access it from "Download" app, or install another file manager.
  • Find anothers by yourself :D

How to ODEX your Android Devices ROM using Lucky Patcher App

If you know so many custom ROM for your Android devices and you ever install them, maybe you will notice that the ROM is on deODEXed state. Maybe the developers is deliberately did it to get some conditons for the users, like so it can be easily modded. Now here is tutorial how to ODEX your deODEXed Android devices ROM using Lucky Patcher app.

Some of Custom ROM i share for Samsung Galaxy V SM-G313HZ on this blog like Zentouch, HiTech, etc. is a deODEXed ROM too.

What is ODEX, deODEX, and the Benefits of each of them.

Requirements:
* Rooted.
* LUCKY PATCHER Android app.
* Backup (If you feel need it).
* Brains :v


Why we should / need using ODEX ROM in our Android smartphone


  • ODEXing you ROM will bring more space in the internal memory. Because in ODEXed ROM, the system app Dalvik Cache will moved / remained to the system partition.
  • It's up to you, if you love mod your Android smartphones using Apktools, it's better keep your ROM in deODEXed state. Because in the ODEXed ROM we can not get the smali folder in the apk file.
  • If we just an casual user of Android smartphone (like me :D ) and have no intend in playing with apktool and modding the system, it's better for us to use the ODEXed ROM because it more stable.
  • For you who like gaming, then this guide is right for you. Because using a deODEXed ROM in your Android smartphones will eat more RAM and more or less will affecting the game performance.

Steps how to ODEX your Android smartphones ROM without PC using Lucky Patcher app


To get maximal result, make sure you have 100 MB or more of empty space on your /system partition device. You can check it using disk monitoring app like DISK INFO PRO.apk. If you feel you have too little empty space on your system partition devices, you may want to delete some unused system app first.

How to Delete Bloatware / System Applications on Android Devices.

  1. Download dan install the Lucky Patcher.apk app.
  2. Open the Lucky Patcher app, go to "Toolbox" -> "ODEX all system apps...", and wait untill the process done.
  3. Done! Reboot your Android smartphone (or reboot automatically).


Inspired by :v : GalaxyVarchive Blog

Getux for CM11 ROM Custom Kernel Samsung Galaxy V SM-G313HZ

Allright, now I will share about custom kernel for Samsung Galaxy V SM-G313HZ called Getux Kernel. For your info, "Getux" is a name of Indonesian food :D . This custom kernel is created for Samsung Galaxy V running CyanogenMod 11 ROM (CM11). So do not try this on other ROM, except you are a true hacker :v . This kernel is created by cleverior.ipul@XDA.

Actually I do not have intend to install a custom kernel before. But recently I need to switch my Samsung Galaxy V SM-G313HZ ROM into the one running Android KitKat because I want to play Final Fantasy IV (FFIV) Android game (Some Square Enix games cannot run on Android Lollipop and up, and one of them is FFIV). Well the stock ROM is sucks :v , so I prefer to go back with CyanogenMod 11 ROM.

But the developer is removed the third final release of CM11 ROM because some bugs. Then I go with the second final release of course, and guess what? It cannot boot up. Luckily I got some qlues by guys there that we can fix it by installing another custom kernel. I had a traumatic with OC kernel as it overclocked to 1.4 GHz (my Samsung Galaxy V SM-G313HZ Android phone cannot handle so high CPU clock speed as make it cannot boot up). Then I choose the Getux Kernel and voila! Finally it can boot :D .

Requirements:

about phone kernel info getux kernel cm11 samsung galaxy v sm-g314hz

overclock getux kernel cm11 samsung galaxy v sm-g313hz

Getux Kernel for Samsung Galaxy V SM-G313HZ CM11 feature


v. 1
  • The standard feature of CM11 stock kernel.
  • Added 600 MHz CPU clock speed.

v. k1.1

  • Re-compiled kernel with Sabermod 4.9.x toolchain
  • (NEW!) Changed zRAM compressor to LZ4 (faster than LZO)
  • Triple-zRAMs (more crazy multitasking)
  • Added new IO scheduler : ROW, FIOPS, SIOPLUS, BFQ, ZEN
  • Added new governor : INTERACTIVE
  • (NEW!) Overclock increased to 1,3GHz
  • Disabled zCache, enabled zswap and enable LZ4 zswap compression
  • LZ4 compression to kernel
  • zRAM backported from Linux 3.9 (to enable LZ4 compression)
  • Init.d supported

How to install Getux Kernel on Samsung Galaxy V SM-G313HZ running CyanogenMod 11 ROM (CM11)


  1. It is recommended to install it on fresh CM11 ROM installment (install it just after the rom is done installed).
  2. Just go to recovery mode and install the zip file of Getux Kernel you just downloaded.
  3. After the Getux Kernel is finish installed, wipe dalvik cache.
  4. Reboot your Android phone!

Getux Kernel for Samsung Galaxy V SM-G313HZ CM11 ROM download link


-> GETUX KERNEL v. 1.zip (5.4 MB)

-> GETUX KERNEL v. k1.1.zip (5.5 MB)

Getux Kernel v. k1.1 notes


There is one update I must underlining it on Getux Kernel v. k1.1, it is that the CPU speed frequency has been overclocked into 1.3 GHz by default. This will bring more performance on this Android phone of course, especially when playing games. But if your Samsung Galaxy V Android phone cannot handle it, it will cause you random reboot.

To set to normal CPU clock speed, we can set it through system settings:
  1. Open the Developer Options. Go to "Settings" -> "About Phone", tap about 7-10 times rapidly on "Build number" section. There should be a toast message "You have enable developer option".
  2. Go back to "Settings" main menu, it should appear "Performance" option now, select it.
  3. Select "Processor" -> "Maximum CPU frequency", and set it to "1.2 GHz".
  4. Do not forget to check the "Set on boot" option.

To activate init.d, type "getuxmagic" (without quotes) in Terminal Emulator app.


Source: Blog Si Ipul.

7 Reasons That Will Make You Want to Root Your Not Rooted Android Device

Android, the open source project mobile system operation is have fast progress in it's development. But there is one thing cannot be separated from Android OS is it the old Android version or even to the most new Android N Nougat, and it is ROOT.

As we know Android is an open source operating system, so we have rights to modify the system as we like. By Rooting our Android device is the way we can unlock "the security seal" of the device so we can through the deep of the system. Actually for honest, Root is something that every user should not do so easy to his device. As for a rooted device can also bring user some serious trouble like bricking it, to the most important things like security and privacy of the user.

rooted android break chain

Also although Root is something that can void the warranty of an Android device, but still most user will do it anyway as there is so many benefits and advantages they get. But nowaday there is so many information we can get on websites tell us how to Root our Android device easily, and even there is solution to prevent if something bad happen when we did a failed Root.

My myself start Rooting my first Android smartphone Samsung Galaxy V SM-G313HZ when it still 3 months old in my hand. You know what is the first reason why I brace myself to rooted my Android smartphone at that time? To get internet access for free (oopss...) :D.

Now here it is, the 7 reasons that will make a user to root his Android device.

  1. Performance and Function Tweak


    When I just got my first Android smartphone, I'm very happy with it. The first game i was hunting is Final Fantasy III, then I playing it and "awesome". Then i knew that GTA game is also playable on Android, but with size 2 GB, but my phone storage is just 2 GB :( . But there is solutions to trick it, move the data and obb of game to external SD card (which usually have great space like 8 GB, 16 GB, 32 GB, etc...) using some applications like Foldermount or some Xposed module like XinternalSD. And guess what? That's right, the applications is need ROOT :D.

    Also with Rooting your Android device, we can do many things to boost the device performance. There is many ways we can improve the performance of our device like removing unnecessarry bloatware (system applications), using some Init.d scripts, applying tweak to the RAM, and many more.
  2. Better Gaming Experience


    Playing game on Android device is also had many variations too. From Playing the usual Android game to playing some old school games like Playstation Portable using emulator application. One more reason to root your Android device for you who are gaming freak, to get more performance on the game and maximize your gaming experience.

    final fantasy iv the after years android game ceodore vs boss

    Let me give you a hints about the best Android application to maximize your gaming experience, and it is GLTools. By using GLtools application, you can enchant the graphic or even reduce lag and quality so you can play hind end game on an low end Android phone.
  3. Change Display and User Interface


    One the most reason why users root his Android device, it is to change the display and User Interface (UI). Yeah, we can change the color, the statu bar icon like clock, battery, change the Settings background with your girlfriend photo, or even fake the signal to 4G even you use a 3G phone :D.

    There is also many ways to do it, and one of the most popular method is using Xposed module as it is fairly easy to use and not too risky. Some popular Xposed module to modify the User Interface: Wanam Xposed (mainly for Samsung Touchwiz Kitkat), Xblast Tool (for Kitkat and down), or GravityBox (available for Android Jelly Bean to Marshmallow).
  4. Stay Up to Date


    Every Android device of course will get system update from the device Vendor. The update can include of Android OS version or even small updates to fix some minor bugs. But I'm sure an Android device will soon stop getting the official updates as more and more new device released. If we want, we also can take an act to update the system or OS version by ourself.

    Like my Samsung Galaxy V Android smartphone, now i'm running it with Android Marshmallow which originally released as Android Kitkat, although it never get official update from the manufacturer. To do that, I am installing an aftermarket firmware created by third party (non-official) and flash it by myself. It is often called installing a "Custom ROM".
  5. Change ROM


    Like I said above, by Installing a custom firmware or custom ROM (the right one of course...) we can update the OS version. But just not that, by Installing custom ROM is like a total modification also to the Display, performance, new features, and many more.

    custom roms on android

    To install a custom ROM, we need a custom recovery. And root is the only way if we want to install a custom recovery directly and using it by our Android device.
  6. Backup and Restore


    Now this also one more things that pretty important, to easily backup and restore of our Android device content. Actually Google also has offer you a service to backup your device to the Google Drive cloud. But it needs a lot of time and bandwith of course.

    If we have a rooted Android device, we can easily backup it's whole content from the applications, system, the apk's and anythings directly to our external storage, so no computer needed. There are many apps on the market that offer to do that, example the best is Titanium Backup and Helium.

    Or even we can make a full backup of our Android device content and system using the Backup feature on custom recovery like TWRP, CWM, etc as easy as "one tap".
  7. Hack 2 Free and Hack 2 Win :D


    Last but not least, is a bad reasons that is we can get premium / paid Android app or game for free. Or just hack an in-app-purchase of an application or game to get some premium features for free. It need some hacking jobs and some right tools like Lucky Patcher, which need root access of course.


    And also we can hack an Android game like the money, the gold, similar like that if we have root access because the system is already unlocked so we can make changes to everythings.

Like I said earlier, rooting your Android device is something you must think twice before to do it. As we get many benefits, a rooted Android device is also could bring us some trouble including bricking it or some serious trouble about your privacy and security.

I think rooting our Android device is ok if we know what app and what kind of jobs the root application will do to our Android device. And choosing the rights Superuser management app is also an important thing so you can keep your privacy and security safe.

Best Xposed Theming App Module for Android I Ever Used [Xposed]

One amazing thing we can do on our Android device if we have Xposed installed, is we can modify and change the system theme (colors, transition effect, etc). The best is because it take advantage of use of Xposed framework and it means the look of our Android device system is changed without touching the apk of system. All changes is safe as it been made on memory and can be easily reverted back just by deactivate the module from the Xposed app.

There are many modules created by for theming our Android device out there. This is a great way for users who want / like to modify Android device looks and view but do not have coding skill or do not want to messy with apk decompiling-recompiling, just like me :D . Now here it is the 5 best Xposed module theming app for modifying Android device system User Interface, version www.indophoneboy.com.

  1. Wanam Xposed by "Wanam"


    Wanam Exposed is a great utility Xposed module Android application for tweaking Android system User Inteface, made especially for Samsung Touchwiz ROM based phone. We can change and modify the status bar, tweak the system menu like power menu, change background, change colors, etc. Wanam Xposed is have 2 version, for Samsung Android 4.2+ and for Samsung Android 5.x+. Its working best environment on a deodexed ROM.

    wanam xposed android module user interface

    Although mainly created for Samsung Touchwiz based phone, its not closing possibility to work on other Custom ROM though the compatibility might not be guaranteed. Head to the official thread of Wanam Xposed on XDA Forum.

    -> DOWNLOAD WANAM XPOSED MODULE.apk
    For Samsung Android 4.2+ (1.8 MB) | For Samsung Android 5.x+ (1.1 MB)
  2. Xblast Tools by "FemBlack"


    Xblast Tools is another great theming Xposed module for Android device. Based on my experience when used it, it is have no different purpose with Wanam Xposed, except Xblast Tools is created to serve for universal Android phone and ROM's starting from Android 4.0.3 and up. Check the thread by "FemBlack" on XDA Forum.

    xblast tools android xposed module user interface

    -> DOWNLOAD XBLAST TOOLS XPOSED MODULE.apk (6.1 MB)
  3. Android Theme Engine / Ex-Themer by "vishal11in"


    For the third entry, there is Android Theme Engine. Also there is 2 different name of this Xposed module but it looks it have actually same purpose and I can catch it because its created by same developer. Android theme Engine is created for more universal Android version from JellyBean, Kitkat to Lollipop, while Ex-Themer is created for Android Kitkat.

    android theme engine xposed module user interface

    What differencing Android Theme Engine and Ex-Themer from Xposed theming app i said above is they have a custom template selection option, which it can make total modification to the system theme and colors by applying from a template inside it (of course partially modification is still exist for you to use). Unfortunately, the compatibility is restricted to only AOSP (Android Open Source Project) based ROM and some popular Android phone only. Read more on the official thread on XDA Forum.

    -> DOWNLOAD ANDROID THEME ENGINE XPOSED MODULE.apk
    Android Theme Engine.apk (10.6 MB) | Ex-Themer.apk (for Kitkat) (2.7 MB)
  4. GravityBox by "C3C076"


    Now this is one of my favorites Xposed module, GravityBox. Actually the "theming" modification feature is almost no exist in this app. GravityBox only created to make some minor modification to the Android system framework like changing the status bar elements, navigation bar elements, power menu, key function tweak, etc. Still I like this Xposed module because it never fail on every ROM i have used and it support from Android Jelly Bean to the Android Marshmallow.

    -> READ MORE ABOUT GRAVITYBOX XPOSED MODULE.
  5. MonsterUI by "KuaQ"


    For the last one, there is a simple and great Xposed theming app for Android called "MonsterUI". The idea of MonsterUI is to theme Android framework style and colors to be a Lollipop Material style. This Xposed module is can work on every ROM's, but all the features and compatibility is working best on AOSP based ROM I think.

    -> READ MORE ABOUT MONSTERUI XPOSED MODULE.


All the Android Xposed module is available on repo.xposed.info. Consider DONATIONS to the developer if you think the application is usefull.

How to Enable Root or Superuser Access on Android Devices Running CyanogenMod ROM

Root is the first step when an Android user decide to journey in the Android hacking and tweaking world. By rooting an Android device, we can open the whole system and possibilities become unlimited. One of the most reason why user want to root their Android device is to installing a custom ROM. Now, for you who are using CyanogenMod ROM on your Android device and want a root mode / access, here is the easy steps to unlock the root mode on CyanogenMod ROMs.

manage root access cyanogenmod 13 rom

How to unlock root mode on Android device running CyanogenMod ROMs


  1. To unlock root mode on Android device which running CyanogenMod ROM, we must unlock the "Developer option". Go to "Settings" menu
  2. Scroll down and select "About phone"
  3. Look for "Build number", then tap rapidly on it for about 7 - 10 times. If you're done it right, there should be appear message "you have enabled developer option".

    tap rapidly build number unlock root android cyanogenmod rom
  4. Now back to "Settings" menu, you will see "Developer option" option, choose it.

    select developer option unlock root android cyanogenmod rom
  5. Scroll down slowly to find "Root Access", tap it. Then choose / select "Apps and ADB".

    select root access unlock root android cyanogenmod rom

    choose apps and adb unlock root android cyanogenmod rom
  6. Done! From now on if you run an application that asking for superuser permission, it will appear menu where you can grant or deny it's superuser permission request.

What is Stock, Custom, Recovery Mode in Android and The Function

Just like it's named, recovery mode take an act to recover your Android device. In simple way for me, recovery mode is like some "first aid" when something happen to your device. Recovery mode is one of feature in Android smartphones that serves to fix, add, replace, remove (delete), the contents of our Android device or even to upgrade the Android version. Maybe we often hear recovery mode is needed when are to install custom ROM, systemUI mod, or adding tweaks (script to boost performance) to our device.

To put our Android device into recovery mode, turn off the device, and then press the following button: Volume Up + Home + Power, simultaneously and hold its for 5 second. When you are in recovery mode, use the Volume Up and Volume Down button as navigation and Power button as confirmation (in CWM recovery the confirmation button is changed to Home button).

Stock recovery in android


Stock recovery is the default recovery of Android smartphones from the device manufacturer. Features in stock recovery is soooo... limited. And sometimes (many times) if we do an "install from zip" will become failed because "file header verification failed", that is because the device manufacturer is some kind like "protect" the system from being modified. Even on some Android smartphone brand does not have default recovery mode installed. So for the reason, installing a custom recovery is something we can not avoid IF we want to change the system of our Android device effectively

(Stock recovery mode on samsung)

Custom recovery CWM and TWRP


As it says "Custom", not original, it is a recovery mode that is made by 3rd party. In Custom recovery is added some features that does not exist in stock recovery like backup, touchscreen support, file manager, etc. There is two most popular custom recovery used by Android device user, that is CMW (ClockWorkMod) and TWRP (Team Win Recovery Project), although there's another custom recovery like Philz Recovery. Most important thing in custom recovery is ability to disable the "signature file verification", so we can install or flash any file we want without worry the zip files being blocked to be flashed because the signature things just like in the default recovery.

(CWM custom recovery mode)

(TWRP Custom Recovery Mode)

To install a custom recovery we need to find the correct recovery file to our Android device model. We must extremely carefull because different way to install the recovery, different smartphone device model, and the recovery file will be different. If we choose the wrong recovery file or wrong method will cause our Android device unable to enter to recovery mode anymore, or even worse: bootloop or softbtrick.

Source: Google.com

Xposed Framework Installer for Android 5.0 and 5.1 Lollipop / CM12.1 ROM

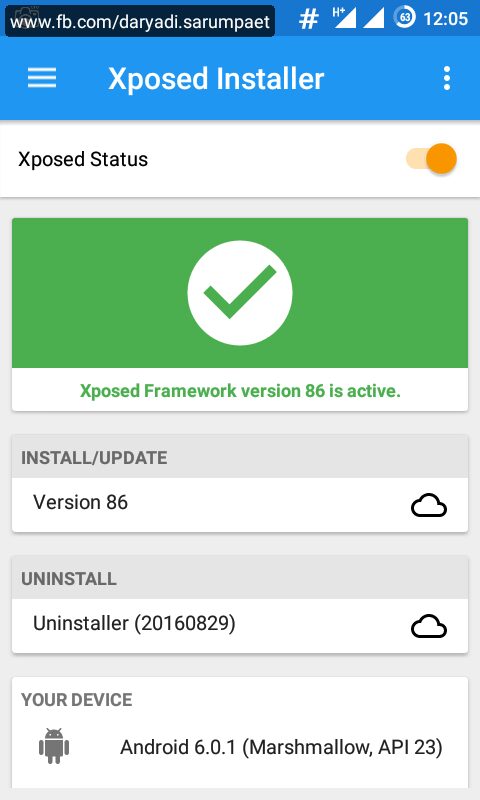
Back with another post about Xposed :v. What should i say? Xposed is a really great invention on Android platform, i really depend on it, more over to the Xposed Additions module to remap my screenshot button. Yeah, with Exposed Framework Installer and Xposed Additions module, now i can take screenshot in my Android smartphone with only holding the 'volume down' button.

Now i will share Xposed Framework Installer for you who used Android phone with Android version 5.0 and 5.1 version. The xposed for Android Lollipop and Marshmallow still developed by Rovo89@XDA and tungstwenty@XDA. The development actually is just on ALPHA-4 state. But I already used it on my Samsung Galaxy V with CM12.1 ROM and it's good no issue found. But beware this is still ALPHA-4 state, and i only try this on CM12.1 ROM, so different device, different ROM, maybe will bring different result.

Requirements
* Custom recovery installed. TWRP is recommended
* Xposed Framework zip flashable, apk, and Xposed Apk for Lollipop up version (download link in the end of post)
* Backup
* Brain :v

xposed v 3.1 for android lollipop and marshmallow up

How to install Xposed Framework Installer on Android Lollipop (tested on CyanogenMod 12.1 ROM


  1. Power off your Android smartphone, and boot into recovery mode.
  2. Just straight install the Xposed Framework.zip file through recovery. After done, wipe dalvik cache and reboot your Android smartphone. Caution! This first reboot time might take a very loooooooong time (on my Samsung Galaxy V it need more less 30 minutes to 1 hour for this first reboot.
  3. After reboot, just install the Xposed.apk for the Android Lollipop up. And finally your Android Lollipop smartphone is ready to rock with Xposed and the modules!
  4. If your Android phone suffer a soft brick or you want to remove xposed framework, then just boot back to recovery mode and try to flash (install) the Xposed Uninstaller.zip file.

Xposed + Framework Installer for Android Lollipop download link


The framework zip flashable are only for advanced users. If you don't have idea what hardware type your Android device is, then you can skip this section and READ DETAILED on XPOSED APK section.

Choose the proper file based on your hardware type. Samsung Galaxy V is an ARM based device.

Xposed Framework.zip

  • -> Xposed Framework.zip for SDK21 (Android 5.0 Lollipop)
    Download: ARM | ARM64 | x86
  • -> Xposed Framework.zip for SDK22 (Android 5.1 Lollipop / CM12.1 ROM)
    Download: ARM | ARM64 | x86

Xposed Uninstaller.zip


Download: ARM | ARMv5 | ARM64 | x86

Xposed.apk


Update changelog:
V 3.1
- Material Design
- Download the correct framework ZIP for your architecture/Android version
- Install/uninstall Xposed directly from the app, no custom recovery required (but obviously you must still make sure that you can reflash your ROM in case something goes wrong!)
- Many changes under the hood for better stability, compatiblity and code quality

# XPOSED v. 3.1.apk (2.8 MB) | 16/10/2016


Check out the original thread by Rovo89 at XDA Forum.